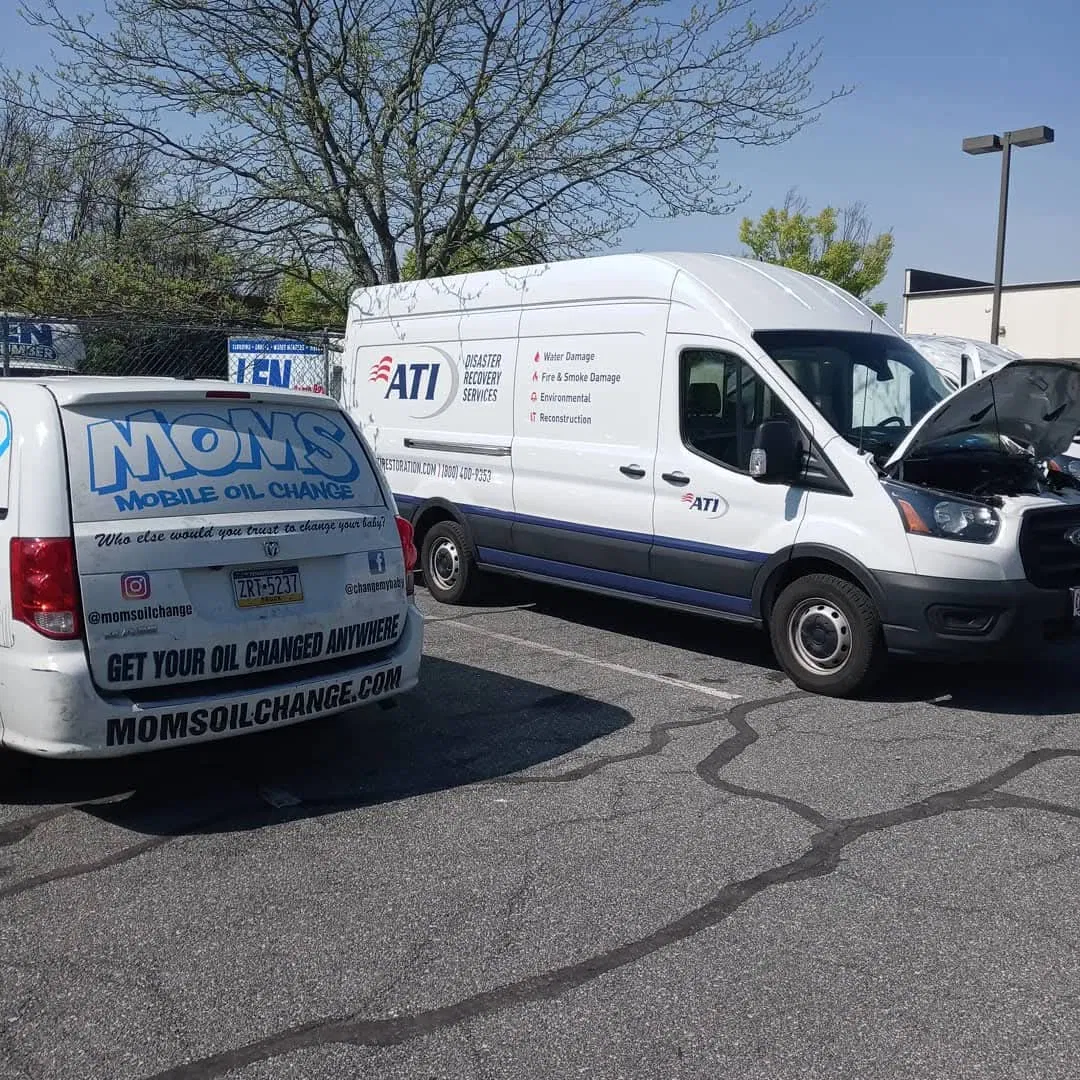
Ram 1500 Oil Change: How to Change the Oil, Filter Location, Capacity & Torque Specs

If you need a Ram 1500 oil change in Philadelphia, Montgomery County, or Ambler, PA, this guide explains how to change oil Ram 1500 trucks safely while covering the key 5.7L HEMI V8 specifications, drain plug location, oil filter access, oil capacity, torque values, and safe DIY steps.

The Ram 1500 5.7L HEMI is a hardworking engine. Many owners use their trucks for towing, commuting, construction, landscaping, deliveries, and family transportation. Regular oil changes are essential for protecting the HEMI’s valvetrain, timing components, bearings, and cylinder deactivation system.

Ram 1500 5.7L HEMI Oil Change Specifications

Always confirm the exact requirements for your model year, engine, and VIN before servicing. The following specifications apply broadly to Ram 1500 trucks equipped with the 5.7L HEMI V8.

Specification Ram 1500 5.7L HEMI
Recommended oil, most model years SAE 5W-20
Required oil specification Chrysler/FCA MS-6395
Newer model-year note Some 2022-and-newer trucks may specify 0W-20; confirm by year and oil filler cap
Oil capacity with filter Approximately 7 quarts, or 6.6 liters
Drain plug socket size 13 mm
Drain plug location Underside of the oil pan, facing toward the rear of the truck
Drain plug torque 25 ft-lbs, or approximately 34 N·m
Oil filter type Spin-on canister filter
Oil filter location Passenger side of the engine block, above the front axle or differential area
Common filter families Mopar MO-899/4884899 family; Mopar 4892339 family; aftermarket equivalents vary by year

Do not automatically use 5W-20 simply because it is common for the 5.7L HEMI. Check your owner’s manual and oil filler cap. Oil requirements can change between generations.

Where Is the Ram 1500 Oil Drain Plug?

The oil drain plug sits on the underside of the engine oil pan. Its head faces toward the rear of the truck and typically requires a 13 mm socket.

Close-up of the Ram 1500 5.7L HEMI oil drain plug with a 13 mm socket

Position your drain pan under the plug before loosening it. Used oil can travel several inches as it leaves the pan, especially if the truck is parked on a slight incline.

The factory drain plug torque specification is 25 ft-lbs. A torque wrench helps prevent two common problems:

  • A loose plug that causes an oil leak.
  • An overtightened plug that damages the oil pan threads or drain plug.

Inspect the sealing surface and washer before reinstalling the plug. Replace the plug if the threads or head are damaged.

Where Is the Oil Filter on a 5.7L HEMI?

The 5.7L HEMI uses a spin-on oil filter. It is located on the passenger side of the engine block, generally above the front axle, differential, or rack-and-pinion area depending on the truck’s configuration.

Ram 1500 5.7L HEMI spin-on oil filter location above the front axle area

Access can be tight. Place the drain pan below the filter before removing it because the filter will contain oil. Some Ram 1500 configurations position the filter horizontally or at an angle, which can make oil spill across the filter housing and nearby components.

Use a filter wrench only if the filter cannot be removed by hand. Avoid crushing the filter or striking it with a screwdriver. That approach can damage the filter housing, create metal debris, or make removal more difficult.

Common Ram 1500 5.7L HEMI Filter Part Numbers

Filter fitment varies by model year and catalog. Common filter families include:

  • Mopar MO-899
  • Mopar 04884899AB/AC or 4884899AB/AC
  • Mopar 4892339 family
  • FRAM XG10060
  • WIX 57060 or 57060XP
  • Other equivalent filters listed for the specific year and 5.7L HEMI engine

Always verify the filter by VIN or a reputable parts catalog. A filter that threads onto the engine is not automatically the correct filter for your truck.

Tools and Supplies You’ll Need

Gather everything before starting:

  • Correct quantity of engine oil
  • New oil filter
  • 13 mm socket
  • Ratchet and extension
  • Torque wrench
  • Oil drain pan large enough for at least 8 quarts
  • Oil-filter wrench, if needed
  • Funnel
  • Gloves and safety glasses
  • Shop towels or absorbent pads
  • Wheel chocks
  • Jack and properly rated jack stands, if additional clearance is necessary
  • Container for transporting used oil to a recycling location

For a full synthetic oil change, use oil that meets the required viscosity and Chrysler MS-6395 specification. MOMS Mobile Oil Change uses premium products, including Mobil 1 options, matched to the vehicle’s requirements.

How to Change the Oil on a Ram 1500 5.7L HEMI

If you searched Ram 1500 oil change or how to change oil Ram 1500, the steps below walk through the process without overcomplicating it.

1. Park on a level surface

Park the truck on a flat, stable surface. Set the parking brake and place wheel chocks behind the wheels.

Run the engine for a few minutes if the oil is cold. Warm oil drains more completely, but never work around oil that is hot enough to burn you.

2. Open the oil filler cap

Open the hood and remove the oil filler cap. This allows air to enter the engine as the old oil drains.

Keep dirt away from the opening. Do not allow dust, leaves, or shop debris to fall into the engine.

3. Position the drain pan

Slide the drain pan under the rear-facing drain plug on the underside of the oil pan. Make sure the pan is far enough toward the rear to catch the initial stream of oil.

4. Remove the drain plug

Use the 13 mm socket to loosen the drain plug. Finish removing it by hand while keeping pressure against the plug.

Move your hand away as soon as the plug releases. Allow the oil to drain fully. This may take several minutes.

5. Reinstall and torque the drain plug

Clean the drain plug and inspect the threads. Reinstall it by hand to avoid cross-threading.

Tighten the plug to 25 ft-lbs with a torque wrench. Do not rely on arm strength or an impact tool for final tightening.

6. Remove the old oil filter

Move the drain pan beneath the passenger-side filter location. Loosen the spin-on filter and turn it slowly by hand.

Check that the old rubber gasket came off with the filter. A double gasket can cause a serious oil leak when the engine runs.

7. Install the new filter

Apply a thin layer of clean oil to the new filter’s rubber gasket. Fill the filter with oil first only if its position and access allow you to do so without spilling oil into the engine bay.

Thread the filter onto the mounting pad by hand. Tighten it according to the filter manufacturer’s instructions. Do not use a wrench to force it tighter unless the instructions specifically require it.

8. Add the new oil

Using a funnel, add approximately 7 quarts of the correct oil with the new filter installed. Do not pour all 7 quarts in blindly if some oil remained in the engine.

Start with about 6.5 quarts. Then:

  1. Reinstall the oil filler cap.
  2. Start the engine for 30–60 seconds.
  3. Turn the engine off.
  4. Wait several minutes for the oil to drain into the pan.
  5. Check the dipstick.
  6. Add oil gradually until the level reaches the full mark.

Never overfill the engine. Too much oil can cause aeration and other engine problems.

9. Check for leaks

With the engine running, inspect the drain plug and oil filter area. Shut the engine off and check again after a few minutes.

Confirm the oil level one more time before driving. Reset the oil-life monitor according to your model year’s procedure.

Common Ram 1500 Oil Change Mistakes

Avoid these frequent problems:

  • Using the wrong viscosity for the model year.
  • Ignoring the MS-6395 specification.
  • Installing a filter based only on thread size.
  • Forgetting to remove the old filter gasket.
  • Tightening the drain plug without a torque wrench.
  • Overfilling the engine to reach the “7-quart” capacity.
  • Working beneath a truck supported only by a jack.
  • Failing to inspect for leaks after service.
  • Pouring used oil onto the ground or into a drain.

If you tow regularly, drive short trips, idle for long periods, or use your Ram for heavy work, follow the severe-duty maintenance schedule in your owner’s manual.

Inspect More Than the Oil

An oil change is an ideal time to catch small problems before they become expensive repairs. During the appointment, inspect:

  • Engine air filter condition
  • Cabin air filter condition
  • Windshield wiper performance
  • Battery health and terminal condition
  • Tire pressure
  • Fluid levels
  • Visible leaks
  • Belts, hoses, and underbody components

A restricted engine air filter can affect airflow and performance. A dirty cabin air filter can reduce HVAC airflow and allow more dust into the passenger compartment. Worn windshield wipers are especially inconvenient during Philadelphia-area rain and winter weather.

MOMS Mobile Oil Change can check these items as part of a professional service visit, including a 23-point inspection. Explore engine and cabin air filter replacement services, cabin air filter replacement, and windshield wiper replacement.

Let MOMS Change Your Ram 1500 Oil at Your Location

DIY maintenance can be satisfying, but a Ram 1500 oil change can be messy and time-consuming when access is tight. MOMS Mobile Oil Change brings certified technicians to your driveway, office parking lot, or fleet location in Ambler, Philadelphia, and Montgomery County.

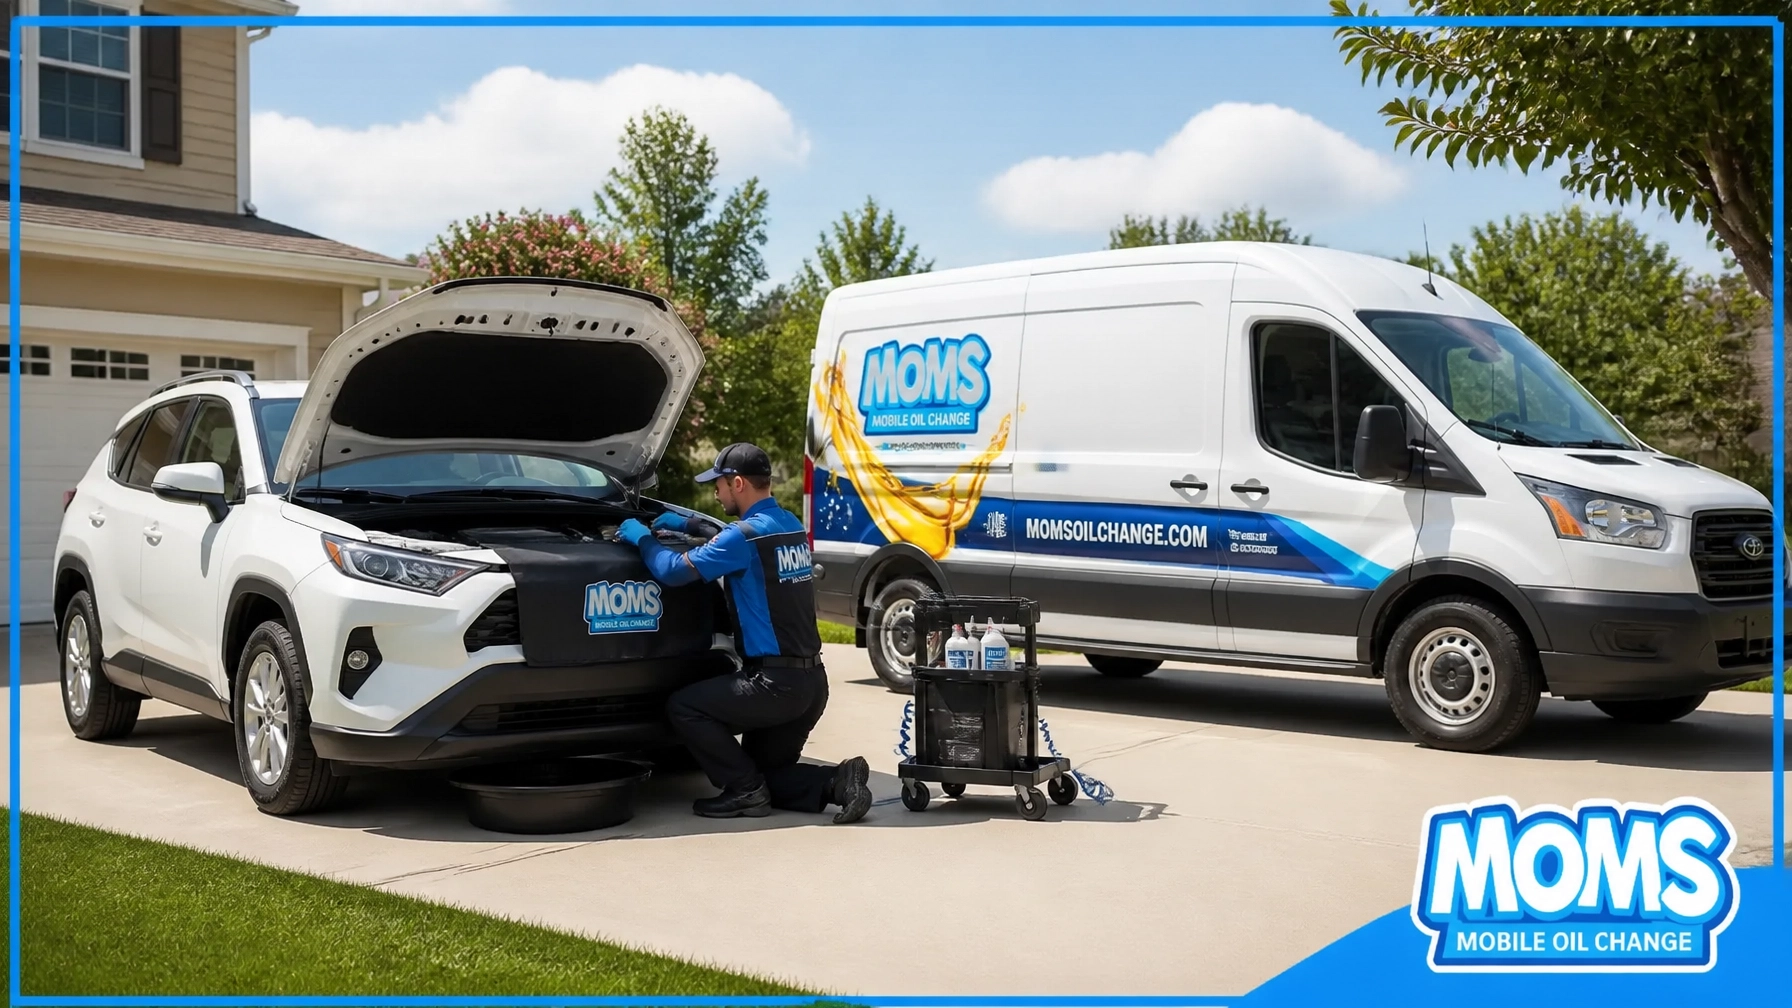
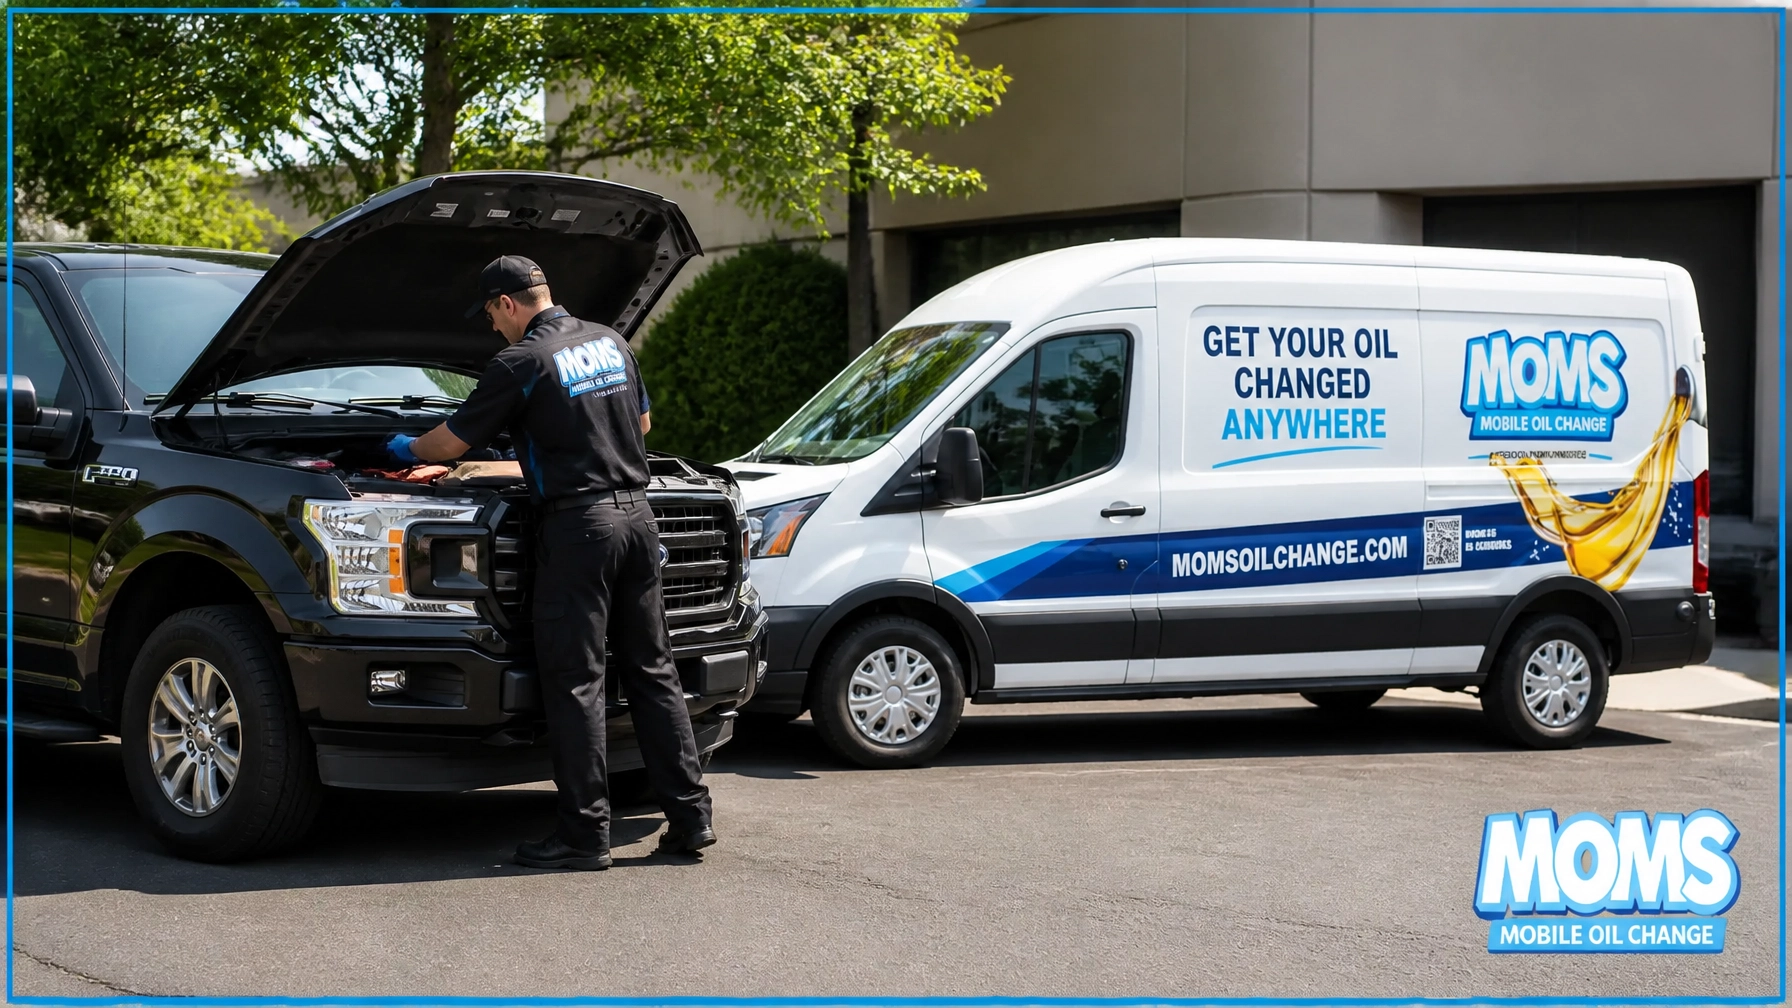
MOMS Mobile Oil Change technician servicing a Ram pickup in a sunny driveway

We bring the oil, filter, tools, inspection process, and cleanup to you. You do not have to drive across town, wait in a shop, or rearrange your workday around a service appointment.

For work trucks, landscaping vehicles, contractor pickups, and delivery fleets, scheduled on-site fleet service helps reduce downtime. Parked trucks do not make money. MOMS can coordinate fleet maintenance at your yard, office, or job location.

Ready to skip the shop? Book a full synthetic oil change or schedule your MOMS service online.

MOMS Mobile Oil Change serves drivers throughout Ambler, Philadelphia, Montgomery County, Blue Bell, Horsham, Willow Grove, Lansdale, Jenkintown, and nearby communities. We come to you so your Ram 1500 can get professional care without the usual trip to the garage.

Sources and Fitment References

Specifications can vary by model year, engine configuration, and VIN. Confirm your truck’s owner’s manual before beginning service.

Honda CR-V Oil Change: How to Change the Oil, Filter Location, Capacity & Torque Specs

This Honda CR-V oil change guide covers the 1.5L turbo engine found in many 2017–2022 CR-V models, including how to change the oil, the drain plug location, oil filter access, oil capacity, torque specification, required tools, and the complete step-by-step procedure.

If you drive to work in Philadelphia, commute through Montgomery County, or manage a busy family schedule in Ambler, changing the oil at home can save a trip to the shop. And if you prefer to skip the mess entirely, MOMS Mobile Oil Change can perform an oil change at your house, driveway, office, or fleet location.

Important: Honda CR-V specifications can vary by model year, drivetrain, and engine configuration. Always confirm the information in your owner’s manual before servicing your vehicle. The specifications below apply to the 1.5L turbo engine configuration covered by this guide.

Honda CR-V 1.5L Turbo Oil Change Specs

Specification Detail
Engine oil 0W-20 full synthetic
Oil specification API SP or current specification listed in your owner’s manual
Capacity with filter Approximately 3.7 quarts
Capacity without filter Approximately 3.4 quarts
Drain plug location Bottom of the engine oil pan
Drain plug socket 17 mm
Drain plug thread M14 x 1.5
Drain plug torque 39 N·m, commonly rounded to 30 ft-lbs
Crush washer Replace during each oil change
OEM oil filter Honda 15400-PLM-A02
Common compatible filters Mobil 1 M1-110A, Wix 51356

The 2020 and 2022 Honda CR-V 1.5L turbo specifications list 0W-20 full synthetic oil, 3.7 quarts with a filter, and a 39 N·m drain plug torque. You can review the 2020 CR-V oil and filter specifications and 2022 CR-V oil and filter specifications for additional reference.

Where Is the Honda CR-V Drain Plug?

Close-up view of a Honda CR-V 1.5L turbo engine oil pan drain plug with a 17mm socket

The drain plug sits on the bottom of the engine oil pan underneath the front portion of the vehicle.
On many CR-V 1.5L turbo models, you may need to remove or open part of the lower engine cover or splash shield before you can reach it.

The drain plug is typically near the passenger side and close to the spin-on oil filter. Use a 17 mm socket. Do not use an adjustable wrench or a poorly fitting socket because rounded drain plug heads can turn a routine oil change into a repair.

Where Is the Honda CR-V Oil Filter?

Close-up view of the Honda CR-V 1.5L turbo spin-on oil filter near the passenger side of the engine oil pan

The 1.5L turbo uses a spin-on oil filter mounted on the engine near the oil pan.
It is accessed from underneath the vehicle, generally on the passenger side.

The lower engine cover may need to come off first. Place a drain pan under the filter before loosening it because oil will drain from the filter housing and engine block. The Honda OEM filter number commonly associated with this engine is 15400-PLM-A02.

Before installing the new filter, apply a light coat of clean engine oil to the rubber gasket. This helps the gasket seat correctly and makes future removal easier.

Tools and Supplies You’ll Need

Gather everything before you begin:

  • 0W-20 full synthetic engine oil
  • Approximately 4 quarts of oil, allowing a small amount for final adjustment
  • New oil filter
  • New drain plug crush washer
  • 17 mm socket
  • Ratchet or breaker bar
  • Torque wrench capable of measuring 39 N·m
  • Oil drain pan
  • Funnel
  • Gloves and safety glasses
  • Wheel chocks
  • Jack and properly rated jack stands, if necessary
  • Shop towels or absorbent pads
  • Flashlight
  • Tools for removing the lower engine cover, if required

Never rely on a vehicle jack alone. If you must raise the CR-V, support it with properly rated jack stands on solid, level ground.

Step-by-Step Honda CR-V Oil Change

1. Park safely and warm the engine

Park the CR-V on a level surface. Set the parking brake and place wheel chocks behind the wheels.

If you are looking up how to change the oil on a Honda CR-V at home, this first step matters most: start safe, stay level, and never rush the setup.

Run the engine for a few minutes. Warm oil drains more completely than cold oil, but avoid working on an engine that is hot enough to cause burns. Shut the engine off before lifting the vehicle or removing any components.

2. Locate the drain plug and oil filter

Look underneath the front of the CR-V. Remove or open the lower engine cover if it blocks access to the drain plug or filter.

Identify the drain plug on the bottom of the oil pan. Confirm that you are not loosening a transmission, transfer case, or rear differential drain plug.

3. Drain the old oil

Position the drain pan beneath the plug. Remember that oil may initially flow outward at an angle, so place the pan accordingly.

Use the 17 mm socket to loosen the drain plug. Finish removing it by hand while keeping pressure against the plug. Allow the oil to drain until it becomes a slow drip.

Inspect the old drain plug and washer. Replace the crush washer before reinstalling the plug.

4. Reinstall and torque the drain plug

Clean the drain plug and the oil pan sealing surface. Thread the plug into the oil pan by hand to prevent cross-threading.

Once the plug is seated, tighten it with a torque wrench to:

39 N·m, or approximately 29–30 ft-lbs

Do not overtighten the plug. Excessive torque can damage the aluminum oil pan threads or distort the washer.

5. Remove the old oil filter

Move the drain pan underneath the oil filter. Loosen the old filter by hand or with an oil filter wrench if it is stuck.

Check that the old filter gasket came off with the filter. A “double gasket” occurs when the old gasket remains stuck to the engine and the new filter is installed on top of it. This can cause a serious oil leak when the engine runs.

6. Prepare and install the new filter

Compare the new filter with the old one. Confirm that the gasket diameter and filter design match.

Apply a thin coat of fresh 0W-20 oil to the new filter’s rubber gasket. Do not fill the filter unless the filter position and manufacturer instructions make that practical.

Thread the new filter onto the engine by hand. Tighten it according to the filter manufacturer’s instructions. Avoid using a wrench to force it tighter after the gasket contacts the mounting surface.

7. Add fresh oil

Remove the oil filler cap on top of the engine. Place a funnel in the filler opening and add approximately 3.4 quarts of 0W-20 full synthetic oil.

For many drivers searching Honda CR-V oil change capacity, the key number is about 3.7 quarts with a filter change on the 1.5L turbo configuration covered here.

Wait briefly, then check the dipstick. Add oil gradually until the level approaches: but does not exceed: the full mark. Because the stated capacity is approximately 3.7 quarts with a filter change, do not pour the entire amount in without checking the dipstick.

8. Run the engine and check for leaks

Start the engine and let it run for about 30–60 seconds. Turn it off and wait several minutes for the oil to return to the pan.

Inspect around the drain plug and oil filter for leaks. Recheck the dipstick on level ground and add oil if needed.

Record the date, mileage, oil type, and filter part number for your maintenance records.

Common Honda CR-V Oil Change Mistakes

Avoid these frequent problems:

  • Using the wrong viscosity instead of 0W-20
  • Forgetting to replace the drain plug crush washer
  • Installing the new filter without lubricating the gasket
  • Leaving the old filter gasket attached to the engine
  • Tightening the drain plug by feel instead of using a torque wrench
  • Overfilling the crankcase
  • Working under a vehicle supported only by a jack
  • Confusing the engine oil drain plug with another fluid drain plug
  • Failing to check for leaks after starting the engine
  • Releasing used oil into a drain, driveway, or soil

Used oil and filters should be collected and recycled through an approved recycling center or service provider.

While You’re There: Check the CR-V’s Other Maintenance Items

An oil change is a convenient time to inspect other components that affect comfort and safety.

MOMS technician inspecting a dirty engine air filter during driveway vehicle maintenance

  • Engine air filter: A dirty filter can restrict airflow and reduce engine efficiency. See MOMS engine air filter replacement.
  • Cabin air filter: Philadelphia pollen, road dust, and traffic pollution can quickly load the cabin filter. A clogged filter may reduce HVAC airflow and contribute to musty odors. Learn more about cabin air filter replacement.
  • Windshield wipers: Philadelphia rain, snow, ice, and summer heat can cause blades to crack or streak. MOMS can install new windshield wiper blades.
  • Battery health: Ask for a battery health check, especially before winter. A visual inspection of the terminals and a battery test can help identify a weak battery before it leaves you stranded.
  • Brakes and fluids: A professional technician can check brake system condition, fluid levels, tire pressure, and other visible maintenance items.

A MOMS full synthetic oil change includes premium oil, a quality filter, and a 23-point inspection to help identify maintenance needs before they become larger problems. Review the full synthetic oil change service for current service details.

Let MOMS Come to You

DIY maintenance can be rewarding, but not every CR-V owner has the time, equipment, or desire to work underneath a vehicle. With MOMS Mobile Oil Change, you can get an oil change that comes to you at your home, office, or another safe location.

That means no waiting room, no drive across Montgomery County, and no rearranging your entire day around a traditional shop. MOMS uses premium products, trained technicians, proper oil disposal, and a clean on-site process.

Whether you searched for an oil change near me, a mobile oil change near me, or an oil change Ambler PA drivers can schedule around work and family, we can help throughout Ambler, Philadelphia, Blue Bell, Horsham, Willow Grove, Lansdale, and nearby communities.

Book your mobile oil change today or contact MOMS Mobile Oil Change to schedule service at your driveway or office.

Toyota RAV4 Oil Change: How to Change the Oil, Filter Housing Location, Capacity & Torque Specs

A Toyota RAV4 oil change is a manageable DIY project when you know the drain plug location, filter housing access point, oil capacity, and tightening specifications. If you are searching how to change oil Toyota RAV4 models with the 2.5L cartridge-style setup, this guide covers the 2AR-FE configuration commonly found in fourth-generation RAV4 models.

If you commute through Philadelphia or Montgomery County, shuttle children around Ambler, or rely on your RAV4 for daily errands, regular oil service protects the engine and helps avoid an inconvenient breakdown.

Important fitment note: Toyota used more than one oil filter design across RAV4 model years and markets. The 2AR-FE uses a cartridge-style filter housing. Some A25A-FKS applications use a spin-on filter and may specify a different oil viscosity or capacity. Always confirm the oil cap, owner’s manual, and filter design before beginning. Do not use the cartridge procedure on a spin-on configuration.

Toyota RAV4 2.5L Oil Change Specifications

Specification 2.5L RAV4 cartridge setup
Recommended oil 0W-20 full synthetic, when specified for your vehicle
Oil capacity with filter Approximately 4.6 quarts
Drain plug location Rear edge of the oil pan
Drain plug size 14mm
Drain plug gasket Replace with a new gasket or crush washer
Filter type Cartridge-style filter element
Filter housing location Front passenger-side corner of the engine
Filter housing wrench 64mm, 14-flute wrench
Drain plug torque Approximately 30 ft-lbs
Filter housing torque Approximately 18–19 ft-lbs
Common filter references Toyota 04152-YZZA1, Wix 57047, Mobil 1 M1C-251, Fram CH9972

Filter part numbers can vary by model year, engine, and manufacturer. Match the replacement filter to your vehicle identification number or owner’s manual before purchasing.

Where Is the Toyota RAV4 Oil Drain Plug?

Close-up of a Toyota RAV4 oil pan showing the rear-edge 14mm drain plug with the MOMS Mobile Oil Change van in the service setting

From underneath the front of the RAV4, locate the black metal oil pan. The oil drain plug sits on the rear edge of the pan, with the bolt head facing toward the back of the vehicle.

The plug uses a 14mm socket. Position your drain pan slightly behind and below the plug because used oil can initially flow outward before settling into a steady stream.

Some newer RAV4s have an under-engine cover or service access panel. Remove only the necessary fasteners to reach the drain plug and filter. Keep the fasteners organized so the cover can be reinstalled correctly.

Where Is the Cartridge Oil Filter Housing?

Close-up of the Toyota RAV4 cartridge-style oil filter housing during service with the MOMS Mobile Oil Change van in the background

The cartridge-style oil filter housing is located near the front passenger-side corner of the engine, ahead of the oil pan. It has a round housing cap and requires a 64mm, 14-flute filter housing wrench for removal.

The filter housing may be extremely tight if a previous service over-tightened it. Use the correct wrench fully seated on the housing. Avoid using pliers, a pipe wrench, or an incorrectly sized cup wrench because the plastic housing can crack or become damaged.

Tools and Parts You’ll Need

Gather everything before raising the vehicle:

  • 14mm socket and ratchet
  • 64mm, 14-flute cartridge filter housing wrench
  • Torque wrench
  • Oil drain pan with at least a six-quart capacity
  • Floor jack and jack stands or approved ramps
  • Wheel chocks
  • Funnel
  • Disposable gloves and eye protection
  • Shop towels
  • Approximately five quarts of 0W-20 full synthetic oil
  • Correct cartridge oil filter
  • New filter housing O-rings
  • New oil drain plug gasket or crush washer

Work on a level, stable surface. A clean driveway in Ambler, Blue Bell, Horsham, or another Montgomery County neighborhood can work well, provided you have enough room to safely access the underside of the vehicle.

Step-by-Step Toyota RAV4 Oil Change

1. Warm the engine briefly

Run the engine for a few minutes. Warm oil drains more easily, but do not begin while the oil is hot enough to cause burns.

Park on a level surface, engage the parking brake, turn off the engine, and chock the rear wheels.

2. Raise and secure the RAV4

Use the manufacturer-approved lifting point. Support the vehicle with properly rated jack stands or use stable automotive ramps.

Never rely on a floor jack alone while working underneath the vehicle.

Open the hood and remove the oil filler cap. Pull the dipstick up slightly to help air enter the engine while the oil drains.

3. Drain the old oil

Place the drain pan beneath the rear edge of the oil pan. Use the 14mm socket to loosen the drain plug counterclockwise.

Remove the plug carefully by hand during the final threads. Allow the oil to drain until it slows to an occasional drip.

Inspect the drain plug threads and sealing surface. Install a new drain plug gasket or crush washer. Reinstall the plug by hand first to prevent cross-threading.

Tighten the drain plug to approximately 30 ft-lbs with a torque wrench.

4. Remove the cartridge filter housing

Move the drain pan under the filter housing. Fit the 64mm, 14-flute wrench onto the housing cap and loosen it counterclockwise.

Let the oil inside the housing drain before fully removing the cap. Remove the used cartridge element and the old O-rings.

Clean the housing cap and sealing surfaces with a lint-free towel.

5. Install the new filter and O-rings

Install the new cartridge filter in the correct direction. Replace every O-ring supplied with the filter kit.

Lightly coat the new O-rings with fresh 0W-20 oil. This helps them seat smoothly and form a reliable seal. Do not install dry O-rings, and do not reuse flattened or stretched seals.

Thread the housing cap into place by hand. It should turn smoothly. If it binds, remove it and start again rather than forcing it.

Tighten the housing to approximately 18–19 ft-lbs. Do not over-tighten the plastic cap.

6. Refill with fresh oil

Lower the vehicle so it sits level. Add approximately 4.6 quarts of 0W-20 full synthetic oil through the filler opening.

Do not pour the full amount in all at once. Start with about four quarts, then check the dipstick.

Replace the filler cap temporarily and run the engine for approximately 30–60 seconds. Turn the engine off and wait five minutes for the oil to settle.

Remove, wipe, reinstall, and remove the dipstick again. Add oil slowly until the level reaches the full mark. Avoid overfilling.

7. Inspect for leaks

With the engine running, inspect the drain plug and filter housing for leaks. Turn the engine off and check again after several minutes.

Look beneath the RAV4 after moving it from the driveway or office parking space. Fresh oil spots can indicate a loose plug, damaged gasket, pinched O-ring, or cracked filter housing.

Record the date, mileage, oil viscosity, and filter part number in your maintenance records.

Common Toyota RAV4 Cartridge Filter Mistakes

The cartridge system is reliable, but it requires more care than a typical spin-on filter.

Avoid these mistakes:

  • Using a spin-on filter when the vehicle requires a cartridge element
  • Reusing the old drain plug gasket
  • Reusing old filter housing O-rings
  • Installing an O-ring in the wrong groove
  • Failing to lubricate the O-rings with fresh oil
  • Installing the O-ring over the threads instead of in its sealing groove
  • Cross-threading the plastic housing cap
  • Using an impact tool on the filter housing
  • Over-tightening the housing and cracking the cap
  • Filling to capacity without checking the dipstick
  • Forgetting to reinstall the under-engine access panel
  • Working beneath a vehicle supported only by a jack

For exact model-year procedures, compare this guide with your Toyota owner’s manual and verify the engine and filter configuration.

Add These Services While Your RAV4 Is Being Serviced

An oil change is an ideal time to inspect other maintenance items.

A clogged cabin air filter can reduce HVAC airflow and allow more dust and pollen into the passenger compartment. This matters during Philadelphia allergy season and on commutes through heavy traffic. Learn more about cabin air filter replacement.

The engine air filter also deserves attention. A dirty filter can restrict airflow and reduce engine efficiency. MOMS can inspect and replace it through our engine air filter replacement service.

Technicians can also check windshield wipers, washer fluid, tire pressure, fluid levels, and battery health during routine maintenance. A weak battery can become especially inconvenient during a cold Montgomery County winter. See our windshield wiper replacement service.

Let MOMS Change Your RAV4 Oil at Home or Work

DIY maintenance can be rewarding, but it also requires equipment, cleanup, used-oil disposal, and time under the vehicle.

MOMS Mobile Oil Change brings professional service to your driveway, office parking lot, or other safe location in Philadelphia, Ambler, Blue Bell, Horsham, Willow Grove, Lansdale, and surrounding Montgomery County communities.

Our full synthetic oil change service includes premium oil options, a quality filter, fluid checks, tire pressure checks, and a documented 23-point inspection. We can also inspect your cabin air filter, engine air filter, wipers, brakes, and battery health during the same visit.

You do not need to drive to a shop or wait in a crowded lobby. We come to you and leave the work area clean.

Book your RAV4 oil change online or call (215) 767-2125 to schedule service.

Sources and Fitment References

Chevy Silverado 1500 Oil Change: How to Change the Oil, Filter Location, Capacity & Torque Specs

If you are searching for a Chevy Silverado 1500 oil change, this guide covers the details that matter most: how to change the oil, the 5.3L V8 drain plug location, oil filter access, oil capacity, viscosity, torque specification, tools, and the correct refill procedure.

This guide focuses primarily on the 2014–2019 Chevrolet Silverado 1500 with the 5.3L Ecotec3 V8. Some specifications vary by model year, engine configuration, and VIN. Always confirm the information in your owner’s manual before beginning service.

Chevrolet Silverado 1500 5.3L oil change specifications

Specification Typical 2014–2019 Silverado 1500 5.3L
Recommended oil SAE 0W-20 full synthetic, dexos1-approved
Capacity with filter Approximately 8 quarts, or 7.6 liters
Drain plug size 15mm
Drain plug location Bottom of the oil pan toward the passenger side
Drain plug torque Approximately 18 ft-lbs, or 24 Nm
Oil filter style Spin-on filter
Oil filter location Near the front of the engine block, close to the oil pan
Filter access From underneath the truck
Common filter numbers ACDelco PF63, PF63E; older applications may use PF48 or PF48E

The 8-quart capacity is a starting point, not a reason to pour all eight quarts in without checking the dipstick. Leave a small amount out initially, run the engine, let the oil settle, and then bring the level to the correct mark.

For exact fitment, check your owner’s manual or verify the truck’s year, engine, and VIN with a parts supplier. The 5.3L in a Silverado 2500 or 3500 may use different oil specifications and capacity.

Where is the Silverado 5.3L drain plug?

The oil drain plug sits on the underside of the engine oil pan, toward the passenger side of the truck. You access it from below.

Chevy Silverado 1500 oil drain plug service with a 15mm socket and the exact MOMS Mobile Oil Change van on site

Look for a single bolt at the low point of the oil pan. Position your drain pan so it catches the initial stream of oil, which may travel sideways before flowing straight down.

A 15mm wrench or socket typically fits the factory drain plug. Use the correct size tool and keep it fully seated on the bolt head. A loose-fitting wrench can round the plug and create a more difficult repair later.

The drain plug torque is approximately 18 ft-lbs. Because torque can vary by model year and oil pan design, verify the value for your specific Silverado before tightening. Do not overtighten the plug. Excessive force can damage the threads, distort the gasket, or make the next oil change unnecessarily difficult.

Where is the oil filter on a Silverado 1500 5.3L?

The 5.3L uses a spin-on oil filter mounted near the front of the engine block, close to the oil pan. You normally access the filter from underneath the truck.

Chevy Silverado 1500 oil filter removal from below with the exact MOMS Mobile Oil Change van at the service location

The filter may be tight from the previous service, especially if it was installed dry or overtightened. Try loosening it by hand first. If needed, use a strap wrench or oil-filter wrench.

Before installing the new filter:

  1. Make sure the old rubber gasket came off with the filter.
  2. Wipe the mounting surface clean.
  3. Apply a thin layer of fresh oil to the new filter gasket.
  4. Thread the new filter on by hand.
  5. Tighten it according to the filter manufacturer’s instructions. Hand-tight plus the specified additional turn is common.

For many 2014–2019 5.3L applications, the current ACDelco filter is PF63. PF63E may appear in older parts listings. Earlier Silverado 5.3L engines may use PF48 or PF48E. Confirm the correct part before starting the job.

Tools and supplies you will need

Gather everything before lifting the truck or removing the drain plug:

  • Approximately 8 quarts of 0W-20 full synthetic oil
  • Correct replacement oil filter
  • 15mm wrench or socket
  • Ratchet and extensions
  • Oil-filter wrench or strap wrench
  • Large drain pan
  • Funnel
  • Nitrile gloves
  • Safety glasses
  • Shop towels or clean rags
  • Replacement drain-plug gasket, if required
  • Wheel chocks
  • Jack stands or approved ramps, if additional clearance is necessary
  • Torque wrench
  • Used-oil container for recycling

Never rely on a hydraulic jack alone to support the Silverado. Use properly rated ramps or jack stands on a level, stable surface.

How to change the oil in a Silverado 1500 5.3L

1. Park safely and warm the engine slightly

Park on a flat surface and engage the parking brake. Chock the wheels if you raise the truck.

Run the engine for a few minutes if it is cold. Warm oil drains more easily, but do not begin while the engine or exhaust components are hot enough to cause burns.

2. Remove the oil fill cap

Open the hood and remove the oil fill cap. This allows air to enter the engine while the old oil drains.

Confirm that the cap identifies 0W-20 or check your owner’s manual before adding oil.

3. Position the drain pan

From underneath, locate the oil pan and drain plug toward the passenger side. Place the drain pan underneath and slightly offset in the direction the oil will initially flow.

4. Remove the drain plug

Use the 15mm wrench or socket to loosen the plug. Finish removing it by hand while keeping pressure against the plug.

Allow the oil to drain completely. Give it several minutes, especially if the truck has been used for towing, hauling, or extended highway driving.

5. Inspect and reinstall the plug

Check the drain plug threads and gasket. Replace a damaged, flattened, or leaking gasket.

Thread the plug in by hand to avoid cross-threading. Tighten it with a torque wrench to approximately 18 ft-lbs, unless your model-year service information specifies a different value.

6. Remove the old oil filter

Move the drain pan beneath the filter. Loosen the spin-on filter and allow oil to drain from it before removing it completely.

Inspect the engine mounting surface. The old filter gasket must not remain stuck to the engine. A double gasket can cause a serious oil leak when the engine starts.

7. Install the new filter

Apply fresh 0W-20 oil to the new gasket. Install the filter by hand until the gasket contacts the mounting surface. Tighten it according to the instructions printed on the filter.

Do not use a wrench to force the filter tighter unless the manufacturer specifically requires it.

8. Add fresh oil

Lower the truck if you raised it. Place a funnel in the oil-fill opening and add approximately 7 to 7½ quarts first.

Reinstall the fill cap. Start the engine and let it run for about 30–60 seconds. Shut it off and wait at least one minute for the oil to return to the pan.

Check the dipstick with the truck on level ground. Add oil gradually until the level reaches the full mark. Avoid overfilling.

9. Check for leaks and reset the monitor

With the engine running briefly, inspect the drain plug and oil filter for leaks. Shut the engine off and check again after the oil settles.

Reset the Silverado’s oil-life monitor according to the instructions for your model year. The menu controls vary between trim levels and instrument clusters.

Dispose of the used oil and filter at an approved recycling location. Never pour used oil onto the ground or into a drain.

Common Silverado oil change mistakes

Avoid these frequent problems:

  • Adding all 8 quarts without checking the dipstick: Capacity is approximate and can vary slightly.
  • Using the wrong oil viscosity: Many 5.3L Ecotec3 applications call for 0W-20, but verify your year and engine.
  • Overtightening the drain plug: Use the correct torque instead of leaning heavily on the wrench.
  • Leaving the old filter gasket behind: This can cause a major leak.
  • Installing the new filter dry: Lubricate the gasket with fresh oil.
  • Failing to check for leaks: Always inspect the plug and filter before driving.
  • Confusing a Silverado 1500 with a 2500 or 3500: Heavy-duty models can have different oil requirements.
  • Ignoring towing conditions: Frequent towing, heavy loads, idling, and short trips may require a more conservative service schedule.

The Silverado 1500 is often used as a family truck, work truck, towing vehicle, or business fleet asset. Those conditions make consistent oil changes especially important.

Do not skip the rest of the inspection

An oil change is an ideal time to check other maintenance items. Ask the technician to inspect:

  • Cabin air filter condition
  • Engine air filter condition
  • Windshield wipers
  • Battery health and terminals
  • Brake system condition
  • Tire pressure
  • Fluid levels
  • Visible leaks
  • Belts, hoses, and lights

MOMS Mobile Oil Change includes a 23-point inspection with its oil change service, helping identify small issues before they become interruptions on the road.

A dirty engine air filter can restrict airflow. A clogged cabin air filter can reduce HVAC performance and air quality. Worn wiper blades can create dangerous visibility problems during Philadelphia rain, snow, and road spray. A battery health check is also valuable before winter starts in Montgomery County.

Learn more about engine air filter replacement, cabin air filter replacement, and windshield wiper replacement.

Let MOMS change your Silverado’s oil on-site

You can perform a Silverado oil change yourself, but you do not have to spend your weekend under a truck.

MOMS Mobile Oil Change brings professional service to your driveway, office parking lot, or fleet location in Ambler, Philadelphia, and Montgomery County. Our technicians arrive with the equipment and supplies needed to complete the service cleanly and efficiently.

You can request a full synthetic oil change with premium oil options, a quality filter, fluid checks, tire-pressure checks, and the 23-point inspection. We can also handle the engine air filter, cabin air filter, wipers, battery checks, and other routine maintenance during the same visit.

For work trucks, contractors, landscapers, delivery vehicles, and other commercial operations, our fleet maintenance service helps reduce downtime. Parked trucks do not make money. On-site fleet service lets your vehicles stay at the yard or office while maintenance is completed.

We serve truck owners throughout Ambler, Blue Bell, Horsham, Willow Grove, Lansdale, Jenkintown, Conshohocken, Philadelphia, and surrounding Montgomery County communities.

Book your mobile oil change and get your Silverado serviced where it sits.

Silverado 1500 5.3L oil change FAQ

How much oil does a Silverado 1500 5.3L take?

A typical 2014–2019 Silverado 1500 with the 5.3L V8 takes approximately 8 quarts with a filter change. Add oil gradually and verify the dipstick.

What oil does a Silverado 5.3L use?

Many 5.3L Ecotec3 engines use 0W-20 full synthetic oil that meets the required dexos1 specification. Confirm the requirement for your exact model year.

What size is the Silverado oil drain plug?

The drain plug commonly uses a 15mm wrench or socket.

What is the Silverado 5.3L drain plug torque?

The commonly reported specification is approximately 18 ft-lbs, or 24 Nm. Verify the torque for your truck’s specific year and VIN.

Can MOMS service a Silverado 1500 at home?

Yes. MOMS can perform a mobile oil change at a suitable driveway, office lot, or fleet location. The vehicle must be parked on a safe, stable, reasonably level surface with enough room for the technician to work.

How often should I change the oil if I tow?

Follow the maintenance schedule in your owner’s manual. Frequent towing, hauling, idling, dusty roads, and short trips can place additional demands on the engine and may justify more frequent service.

Technical reference: 1A Auto’s 2014–2019 Chevy Silverado oil change guide and GM/ACDelco filter information. Always verify specifications for the exact vehicle.

Ford F-150 Oil Change: How to Change the Oil, Filter Location, Capacity & Torque Specs

A Ford F-150 oil change on the 5.0L Coyote V8 is a manageable DIY project if you want to know how to change oil Ford F-150 models with the correct oil, filter, tools, and torque specifications. This guide covers the drain plug location, filter access, oil capacity, step-by-step instructions, safety precautions, and common mistakes.

The information below applies broadly to 5.0L Coyote F-150 models, but Ford made changes across model years. Always confirm the exact specification in your owner’s manual or by VIN before starting.

If you would rather skip the crawl under the truck, MOMS Mobile Oil Change can perform a professional oil change in your driveway, office parking lot, or fleet yard throughout Ambler, Philadelphia, and Montgomery County.

Ford F-150 5.0L Coyote Oil Change Specs

Specification 5.0L Coyote F-150
Recommended oil SAE 5W-20 full synthetic
Approximate capacity with filter 7.7 quarts
Drain plug location Rear/bottom of oil pan near the crossmember
Drain plug size 13mm, 15mm, or 16mm depending on year
Some newer drain plugs Twist-lock plastic quick-drain plug
Drain plug torque 19–25 ft-lbs
Filter location Low on the front/passenger side of the engine
Filter access Usually easiest from underneath
Filter installation Hand-tighten ¾ turn after gasket contact
Common filter example Motorcraft FL-500S; verify by year and VIN

Do not pour in the full 7.7 quarts immediately. Start with approximately 7 quarts, run the engine briefly, allow the oil to settle, and adjust the level using the dipstick.

Ford F-150 5.0L Drain Plug Location

Close-up of the Ford F-150 5.0L Coyote oil drain plug near the rear of the oil pan and crossmember

The 5.0L Coyote drain plug sits at the rear or bottom of the engine oil pan, close to the front crossmember. From the front of the truck, slide underneath and look toward the back edge of the engine oil pan.

Do not confuse the engine oil pan with the transmission pan. The engine oil pan is attached directly below the engine. The drain plug will be at its lowest rear section.

Depending on the model year, your F-150 may have:

  • A conventional metal hex-head drain plug
  • A 13mm, 15mm, or 16mm plug
  • A plastic twist-lock quick-drain plug
  • A splash shield or underbody cover partially blocking access

Inspect the plug before choosing a socket. Using the wrong size can round the plug or damage a plastic quick-drain fitting.

Ford F-150 5.0L Oil Filter Location

Close-up of the Ford F-150 5.0L Coyote oil filter on the low front/passenger side of the engine

The spin-on oil filter is mounted low on the front/passenger side of the engine block. Access is generally easier from underneath the truck, although some owners can reach it from above near the airbox.

Expect oil to spill when you loosen the filter. Position your drain pan beneath the filter before removing it. A filter wrench or oil-filter pliers may be needed if the old filter was installed too tightly.

Common replacement filter examples include:

  • Motorcraft FL-500S
  • WIX 57502
  • FRAM PH10575
  • K&N HP-2011

Filter applications can vary by model year and manufacturer. Confirm the part number before installation.

Tools and Supplies You’ll Need

  • Approximately 8 quarts of SAE 5W-20 full synthetic oil
  • Correct replacement oil filter
  • 13mm, 15mm, or 16mm socket, depending on the drain plug
  • Ratchet and extension
  • Torque wrench capable of reading 19–25 ft-lbs
  • Large drain pan
  • Oil-filter wrench or pliers
  • Funnel
  • Nitrile gloves
  • Safety glasses
  • Shop towels or absorbent pads
  • Wheel chocks
  • Ramps or properly rated jack stands, if needed

Keep a replacement drain-plug O-ring or gasket available if your model uses one. Replace it if it looks cracked, flattened, swollen, or damaged.

How to Change the Oil on a Ford F-150 5.0L

1. Park on a level surface

Park the truck on level ground. Set the parking brake and place wheel chocks behind the rear tires.

If you need to raise the F-150, use ramps or jack stands rated for the truck’s weight. Never work underneath a vehicle supported only by a hydraulic jack.

2. Warm the engine briefly

Run the engine for approximately five minutes. Warm oil flows more easily and carries more contaminants out of the engine.

Do not begin immediately after towing, hauling, or highway driving. Hot oil can cause serious burns. Let the truck cool until the oil is warm but manageable.

3. Open the oil-fill cap

Remove the oil-fill cap and pull the dipstick. This allows air to enter the crankcase and helps the old oil drain smoothly.

4. Position the drain pan

Place the drain pan beneath the rear of the engine oil pan. Account for the initial stream of oil, which may travel outward before falling.

If an underbody cover blocks access, remove only the fasteners necessary to expose the drain plug. Keep the hardware organized for reinstallation.

5. Remove the drain plug

Use the correct six-point socket and turn the plug counterclockwise. Keep pressure on the socket to prevent slipping.

As the plug loosens, keep your hand ready to move it away from the oil stream. Allow the oil to drain for at least five to ten minutes, or until it slows to a steady drip.

6. Inspect and reinstall the plug

Clean the drain plug and inspect the gasket or O-ring. Replace damaged sealing material.

Thread the plug in by hand first. This helps prevent cross-threading. Tighten it with a torque wrench to 19–25 ft-lbs, following the specification for your specific model year.

Do not overtighten the plug. Excessive force can damage the threads or oil pan.

7. Replace the oil filter

Move the drain pan beneath the filter. Loosen the old filter and allow it to drain before removing it completely.

Check that the old rubber gasket came off with the filter. A double gasket can cause a major leak as soon as the engine starts.

Wipe the filter mounting surface clean. Apply a thin layer of fresh oil to the new filter gasket. Pre-filling a horizontal or angled filter may create a mess, so follow the filter’s position and install it carefully.

Thread the new filter on by hand. Once the gasket contacts the mounting surface, tighten it approximately three-quarters of a turn. Do not use a wrench for final tightening.

8. Add fresh oil

Insert a funnel into the oil-fill opening. Add approximately 7 quarts of SAE 5W-20 full synthetic oil.

Replace the oil-fill cap, start the engine, and let it idle for about one minute. Shut the engine off and wait several minutes for the oil to drain back into the pan.

Check the dipstick on level ground. Add oil in small increments until it reaches the full mark. Avoid overfilling.

9. Check for leaks

With the engine running, inspect the drain plug and oil filter for leaks. Shut the engine off and check again after a few minutes.

Wipe away any oil residue so future leaks are easier to identify. Reset the oil-life monitor according to your model year’s dashboard instructions.

Safety Notes for F-150 DIY Oil Changes

  • Never work beneath a truck supported only by a jack.
  • Wear gloves and safety glasses.
  • Keep oil away from hot exhaust components.
  • Chock the wheels before working underneath the vehicle.
  • Do not crawl under an unstable truck or on soft ground.
  • Keep children and pets away from the work area.
  • Recycle used oil and the old filter through an approved collection location.

Towing and hauling place additional stress on the 5.0L engine. If your F-150 regularly pulls a trailer, carries heavy loads, or spends time in stop-and-go Philadelphia commuter traffic, follow the severe-service maintenance recommendations in your owner’s manual.

Common Ford F-150 Oil Change Mistakes

Using the wrong oil viscosity

The oil-fill cap and owner’s manual should be your first references. The specification in this guide is approximately 5W-20 for the 5.0L Coyote, but model-year requirements can change.

Guessing the drain plug size

Do not force a 15mm socket onto a 16mm plug or use an adjustable wrench on a damaged fitting. Verify the plug before applying force.

Over-tightening the oil filter

The filter gasket creates the seal. Hand-tightening it three-quarters of a turn after gasket contact is usually sufficient.

Forgetting to check the old gasket

A stuck gasket can cause a serious oil leak. Always confirm that only one filter gasket remains on the engine.

Filling to capacity without checking the dipstick

The stated 7.7-quart capacity is approximate. Add oil gradually and verify the level after running the engine.

Ignoring related maintenance

An oil change is an excellent time to inspect the engine air filter, cabin air filter, windshield wipers, battery health, tire pressure, fluid levels, and brake system.

MOMS Mobile Oil Change technician inspecting air filters at an on-site service location

Let MOMS Handle Your F-150 Oil Change On-Site

A DIY Ford F-150 oil change can take 45–60 minutes once you gather the tools, lift the truck safely, drain the oil, clean up, and dispose of the used materials.

MOMS Mobile Oil Change removes the trip entirely. We come to your driveway, your office, or your fleet location with professional equipment and premium products. Our full synthetic oil change service includes an oil filter, fluid checks, tire-pressure verification, and a comprehensive 23-point inspection.

During the appointment, our technicians can also check or replace:

For Montgomery County truck owners in Ambler, Blue Bell, Horsham, Lansdale, Willow Grove, and nearby communities, an on-site oil change means no waiting room and no second vehicle needed.

For businesses operating F-150 work trucks, service vans, or delivery vehicles, downtime adds up quickly. Parked trucks do not make money. Our fleet maintenance service provides on-site fleet service, scheduled maintenance, documentation, and batch servicing at your yard or office.

MOMS Mobile Oil Change fleet service at a commercial parking lot

Ready to get your Ford F-150 serviced? Book your mobile oil change and let MOMS bring professional maintenance directly to your location.

Frequently Asked Questions

How much oil does a 5.0L F-150 take?

The approximate capacity is 7.7 quarts with a new filter. Add oil gradually and confirm the final level on the dipstick.

Where is the drain plug on a 5.0L Coyote?

It is located at the rear/bottom of the engine oil pan near the front crossmember.

What size socket fits the F-150 5.0L drain plug?

Depending on the model year, the plug may use a 13mm, 15mm, or 16mm hex. Some trucks use a twist-lock plastic plug.

How tight should the drain plug be?

Use a torque wrench and tighten the drain plug to approximately 19–25 ft-lbs, confirming the exact specification for your year.

How tight should the oil filter be?

Install the filter by hand until the gasket contacts the mounting surface, then tighten it approximately three-quarters of a turn.

Can MOMS change the oil in my F-150 at home?

Yes. MOMS Mobile Oil Change can service your F-150 at a safe driveway, office parking lot, or fleet location across the Greater Philadelphia and Montgomery County service area.

Oil Change Guides for America’s 5 Best-Selling Vehicles: Drain Plug Locations, Filter Access & Specs

America’s most popular vehicles include the Ford F-Series, Chevrolet Silverado 1500, Toyota RAV4, Honda CR-V, and Ram 1500. This guide explains how to change the oil on representative versions of each vehicle, including the drain plug location, oil filter access, tools, torque specifications, and refill details.

The exact location and specification can vary by model year, drivetrain, engine option, and oil-pan design. Always compare these figures with your owner’s manual or factory service information before beginning.

Visual note: The images in this guide are location-reference illustrations. Use them to understand the general layout, but confirm the exact components on your vehicle before removing anything.

Quick comparison chart

Vehicle and engine Oil type Approx. capacity with filter Drain plug size Filter location Drain plug torque
Ford F-150 5.0L V8 Coyote 5W-20 About 7.7 quarts 13–16 mm, depending on year Low front/passenger side of engine 19–25 ft-lbs
Chevrolet Silverado 1500 5.3L V8 0W-20 About 8 quarts 15 mm Front of engine block, near oil pan Verify by year; commonly about 18 ft-lbs
Toyota RAV4 2.5L 0W-20 full synthetic About 4.6 quarts 14 mm Front passenger-side filter housing About 30 ft-lbs
Honda CR-V 1.5L turbo 0W-20 full synthetic About 3.7 quarts 17 mm Engine/oil-pan area near passenger side 39 N·m / 30 ft-lbs
Ram 1500 5.7L HEMI 5W-20; newer applications may use 0W-20 About 7 quarts 13 mm Passenger side above front axle 25 ft-lbs

Tools and safety equipment

Before you start, gather:

  • Correct engine oil and replacement filter
  • Large drain pan
  • Ratchet and correct sockets
  • Oil-filter wrench
  • Torque wrench
  • Funnel
  • Gloves and safety glasses
  • Wheel chocks
  • Jack stands or ramps, if necessary
  • Shop towels and brake cleaner

Work on a level surface. Let the engine cool enough to avoid burns, but warm oil drains more easily. Never work beneath a vehicle supported only by a jack. Recycle used oil and filters at an approved collection location.

1. Ford F-150 5.0L V8 Coyote

Ford F-150 drain plug and oil filter location reference

Locations and specifications

The drain plug sits at the rear or lowest section of the oil pan, near the crossmember. Depending on the year, the plug may use a 13 mm, 15 mm, or 16 mm hex head. Some F-150 versions use a twist-lock plastic drain plug instead.

The spin-on oil filter is low toward the front/passenger side of the engine. It may be easier to reach from underneath, although some owners access it from above near the airbox. A molded drain tray may direct oil toward an opening in the splash shield.

Steps

  1. Warm the engine briefly and park on level ground.
  2. Position the drain pan beneath the rear/bottom of the oil pan.
  3. Remove the drain plug with the correct socket and let the oil drain.
  4. Inspect the plug and integrated seal or washer.
  5. Remove the old filter. Confirm its gasket came off with the filter.
  6. Lubricate the new filter gasket with fresh oil.
  7. Install the filter by hand until the gasket contacts, then tighten approximately three-quarter turn more.
  8. Reinstall the drain plug and torque it to the specification for your exact year, typically 19–25 ft-lbs.
  9. Add approximately 7.7 quarts of 5W-20, then verify the dipstick level.
  10. Start the engine, check for leaks, shut it off, and recheck the level after several minutes.

2. Chevrolet Silverado 1500 5.3L V8

Chevrolet Silverado 1500 drain plug and oil filter location reference

Locations and specifications

The Silverado’s drain plug sits on the bottom of the oil pan toward the passenger side. A 15 mm wrench typically fits the plug. The spin-on filter mounts near the front of the engine block, close to the oil pan, and is accessed from below.

The 5.3L V8 commonly uses 0W-20 oil. Many applications require approximately eight quarts with a filter change, but confirm the capacity on the oil fill cap or in the owner’s manual.

Steps

  1. Raise and support the truck safely if additional clearance is needed.
  2. Place the drain pan beneath the oil pan drain plug.
  3. Remove the 15 mm plug and allow the oil to drain completely.
  4. Inspect the sealing surface and washer.
  5. Move the drain pan under the oil filter and remove the old filter.
  6. Check that the old filter gasket is not stuck to the engine.
  7. Apply fresh oil to the new gasket and install the filter by hand.
  8. Tighten the drain plug to the specification for your model year. Some guides list approximately 18 ft-lbs.
  9. Refill with 0W-20. Start with less than the full capacity, then adjust using the dipstick.
  10. Check the oil-pressure warning light and inspect both service points for leaks.

For an additional reference, see this Silverado oil-change procedure from 1A Auto.

3. Toyota RAV4 2.5L

Toyota RAV4 drain plug and cartridge filter housing location reference

Locations and specifications

The RAV4’s drain plug is located on the rear edge of the oil pan and normally uses a 14 mm socket. The cartridge-style filter housing is at the front passenger-side corner of the engine and requires a 64 mm, 14-flute filter-housing wrench.

Use 0W-20 full synthetic oil. Capacity is approximately 4.6 quarts with a filter replacement. Replace the drain-plug gasket and lubricate the filter-housing O-ring with fresh oil.

Steps

  1. Park level, set the parking brake, and remove the underbody cover if necessary.
  2. Place the drain pan beneath the rear edge of the oil pan.
  3. Remove the 14 mm drain plug and install a new gasket during reassembly.
  4. Drain the filter housing using its small drain port, if equipped.
  5. Remove the housing cap with the 64 mm, 14-flute wrench.
  6. Replace the cartridge filter and both required O-rings.
  7. Lubricate the O-rings and reinstall the housing cap.
  8. Torque the filter housing to approximately 18–19 ft-lbs and the small housing drain plug to approximately 9 ft-lbs.
  9. Torque the oil-pan drain plug to about 30 ft-lbs.
  10. Refill with approximately 4.6 quarts of 0W-20, start the engine, and verify the level.

A detailed photo guide is available from Paul’s Travel Pictures.

4. Honda CR-V 1.5L turbo

Honda CR-V drain plug and oil filter location reference

Locations and specifications

The CR-V’s oil filter and drain plug are located together near the front/passenger-side area of the engine oil pan. Some models require removing the lower engine cover first.

The drain plug normally uses a 17 mm socket and should be tightened to 39 N·m, or approximately 30 ft-lbs. Use 0W-20 full synthetic oil. The OEM filter reference supplied for this application is Honda 15400-PLM-A02.

Steps

  1. Remove the lower cover if it blocks access.
  2. Locate the oil-pan marking or arrow identifying the engine-oil drain plug.
  3. Remove the 17 mm drain plug and replace the crush washer.
  4. Remove the old spin-on filter with an oil-filter wrench.
  5. Make sure the old gasket came off with the filter.
  6. Apply a light coat of fresh oil to the new filter gasket.
  7. Install the filter by hand until the gasket contacts, then tighten approximately three-quarter turn.
  8. Torque the drain plug to 30 ft-lbs.
  9. Add approximately 3.7 quarts of 0W-20, then check the dipstick.
  10. Start the vehicle, inspect for leaks, and reinstall the lower cover.

See the Honda CR-V oil-change guide for additional underbody reference photos.

5. Ram 1500 5.7L HEMI

Ram 1500 drain plug and oil filter location reference

Locations and specifications

The drain plug is on the underside of the oil pan, facing toward the rear of the truck. It commonly uses a 13 mm socket and is torqued to approximately 25 ft-lbs.

The spin-on oil filter is mounted on the passenger side of the engine block. On many trucks, it sits horizontally or at an angle above the front axle or differential.

Most 5.7L HEMI applications use 5W-20 meeting Chrysler MS-6395. Some newer configurations specify 0W-20, so confirm the oil cap and owner’s manual. Capacity is commonly about seven quarts with a filter.

Steps

  1. Warm the engine briefly and place the drain pan beneath the rear-facing drain plug.
  2. Remove the 13 mm plug and allow the oil to drain.
  3. Reinstall the plug and torque it to 25 ft-lbs.
  4. Move the pan beneath the passenger-side filter.
  5. Remove the old filter and verify that its gasket is not stuck.
  6. Lubricate the replacement gasket with fresh oil.
  7. Install the filter hand-tight.
  8. Add approximately seven quarts of the specified oil.
  9. Start the engine and wait for oil pressure to build.
  10. Shut the engine off, wait several minutes, verify the dipstick, and inspect for leaks.

For another visual reference, review this Ram 1500 HEMI oil-change guide from 1A Auto.

Do more than an oil change

A professional oil change is the right time to check other wear items. Ask about:

These checks help identify small problems before they become inconvenient breakdowns.

Prefer to have us handle it?

DIY maintenance can be rewarding, but you do not need to spend your weekend under a truck or SUV. MOMS Mobile Oil Change provides professional, on-site oil changes for Ford F-Series trucks, Chevrolet Silverado, Toyota RAV4, Honda CR-V, Ram 1500, and many other vehicles.

Our certified technicians come to your driveway, office, or fleet location with premium oil, OEM-quality filters, a vehicle inspection, and a clean-up process. Schedule an oil change or explore our full synthetic oil-change service.

For businesses, parked trucks do not make money. MOMS provides on-site fleet maintenance, including mobile fleet oil changes, scheduled preventive maintenance, reporting, and service at your yard or office.

Important disclaimer

This guide is for general educational purposes. Oil capacity, filter design, drain-plug size, torque, and oil grade can vary by model year, engine, trim, drivetrain, and market. Always confirm the correct specifications in your owner’s manual or factory service information. If you are not fully confident lifting or servicing your vehicle, let a qualified technician handle the work.

The Ambler Driver’s Guide to Oil Changes: Intervals, Synthetic vs Conventional, and What a Professional Service Really Includes

If you are looking for an oil change service in Ambler, PA 19002, MOMS Mobile Oil Change brings certified maintenance directly to your driveway or office parking lot. You do not need to fight traffic, sit in a waiting room, or rearrange your workday around a shop appointment.

This guide explains how often to change your oil, how conventional and synthetic oils differ, what a proper professional service includes, and how Ambler drivers can protect their vehicles between appointments.

Why oil changes matter for Ambler drivers

Motor oil lubricates moving engine components, helps manage heat, carries contaminants away from sensitive parts, and reduces wear during every start-up.

That matters in Ambler because many vehicles experience a mixture of:

  • Short trips around town
  • Stop-and-go traffic on local roads and Route 309
  • Commuting toward Philadelphia and the Blue Route/I-76 corridor
  • Cold winter starts and hot summer temperatures
  • Long periods of idling or slow traffic
  • Family errands, school runs, and weekend travel

These conditions can qualify as “severe service” under some manufacturer schedules. The exact definition depends on your vehicle, but frequent short trips and heavy traffic are common reasons to follow the more conservative maintenance interval in your owner’s manual.

An oil change that comes to you is especially useful for busy suburban drivers. While MOMS services your car, you can keep working from home, handle family responsibilities, or continue your day at the office.

How often should you change your oil?

The old 3,000-mile rule is not universal anymore. Many modern vehicles can safely go farther between services, especially when they use full synthetic oil. However, the opposite mistake is also common: assuming every vehicle can go 10,000 or 15,000 miles.

Your vehicle’s owner’s manual and oil-life monitor should come first.

As a general guide:

  • Conventional oil: Often around 3,000–5,000 miles
  • Synthetic blend: Often around 5,000–7,500 miles
  • Full synthetic oil: Commonly around 7,500–10,000 miles
  • High-mileage oil: Follow the vehicle manufacturer’s recommended interval

Some newer vehicles allow longer intervals. Others require shorter service intervals because of engine design, turbocharging, towing, driving habits, or severe-service conditions.

Time matters, too. Oil can absorb moisture and degrade even when your vehicle sits in the driveway. If you rarely drive, changing the oil at least once a year is a sensible baseline unless your manufacturer specifies otherwise.

Interval myths worth ignoring

Myth: Every vehicle needs an oil change every 3,000 miles.
Not necessarily. That interval may be appropriate for some older vehicles or demanding driving conditions, but many newer vehicles have longer manufacturer-approved schedules.

Myth: Full synthetic oil means you can ignore the oil-life monitor.
No. Synthetic oil offers excellent protection, but it still needs to be changed according to the manufacturer’s mileage and time recommendations.

Myth: If the oil looks dark, it must be bad.
Color alone does not tell the whole story. Oil can darken as it collects contaminants and additives do their job. Mileage, time, oil level, vehicle condition, and the manufacturer’s schedule matter more.

Conventional vs. full synthetic vs. high-mileage oil

The right oil is not about choosing the most expensive option. It is about matching the product to your engine and driving habits.

Oil type Best fit Main benefits Important note
Conventional Older vehicles that allow conventional oil Basic lubrication and engine protection Usually requires shorter intervals
Full synthetic Modern engines, turbocharged vehicles, frequent commuters, and extreme temperatures Better resistance to heat and breakdown, strong cold-start protection, longer approved intervals Use the viscosity and specification listed by the manufacturer
High-mileage Vehicles with approximately 75,000 miles or more, depending on condition Formulations may help condition aging seals and reduce minor seepage It cannot repair a damaged seal or active leak

Full synthetic oil is engineered for consistent performance across a wider temperature range. That can be valuable during a cold Ambler morning or after hours of summer traffic on the way toward Philadelphia.

High-mileage oil can be a practical choice for an older Honda CR-V, Ford F-150, Toyota Camry, or family SUV. But “high mileage” does not automatically mean the vehicle needs it. A professional should consider the vehicle’s mileage, oil-consumption history, leaks, manufacturer requirements, and current condition.

Read more about MOMS’ full synthetic oil change service, high-mileage oil change service, and standard oil change service.

What a professional oil change really includes

A proper oil change is more than removing old oil and pouring in new oil.

At MOMS Mobile Oil Change, a typical service includes:

  1. The correct motor oil
    We match the oil type, viscosity, and specification to your vehicle. Premium options such as Mobil 1 may be available based on your vehicle and service selection.

  2. A new quality oil filter
    The filter removes contaminants from the oil as it circulates through the engine. Reusing an old filter defeats part of the purpose of fresh oil.

  3. Correct filling and level verification
    Overfilling can be harmful, just as running low can be. The technician verifies the final level according to the vehicle’s requirements.

  4. A 23-point vehicle inspection
    This helps identify maintenance concerns before they become roadside problems. The inspection may include fluids, tires, lights, visible leaks, battery condition, and other basic vehicle systems.

  5. Battery health and terminal checks
    Battery problems often appear when temperatures drop. A quick health check can help identify a weak battery before it leaves you stranded.

  6. Tire pressure and fluid checks
    Proper tire pressure supports handling, safety, and fuel economy. Washer fluid and other accessible fluid levels are also checked.

  7. A clean work area and maintenance record
    Used oil and filters are handled responsibly, and service details are documented for your records.

MOMS technician performing an on-site oil change for a truck at a residential location

A 23-point maintenance inspection is not the same as an official Pennsylvania state inspection. Pennsylvania requires an annual safety inspection, and Montgomery County drivers may also need emissions testing depending on the vehicle and registration requirements. Your oil-change inspection is a preventive check that can help you spot concerns before your state inspection appointment.

What to expect from a mobile oil change in Ambler

Booking an oil change near me does not have to mean driving somewhere and waiting. With a mobile oil change, you select a suitable location and appointment time. MOMS comes to you.

Here is the typical process:

  • Book online and provide your vehicle information.
  • Choose your Ambler home driveway, office lot, or another safe location.
  • Make sure the vehicle is on a flat, paved surface with enough room to work.
  • A trained technician arrives with the required oil, filter, tools, and equipment.
  • The oil and filter are replaced.
  • The technician completes the 23-point inspection and shares any findings.
  • The work area is cleaned before the technician leaves.

Most appointments take approximately 45–60 minutes, depending on the vehicle and service requirements.

That is the difference between a traditional appointment and an oil change that comes to you. If you have searched for a mobile oil change near me, an at home oil change, an oil change at your house, or a “come to me oil change,” the goal is the same: keep your vehicle maintained without sacrificing hours of your day.

How to check your own oil between services

Checking your oil takes only a few minutes on vehicles equipped with a dipstick.

  1. Park on level ground.
  2. Turn off the engine and wait several minutes.
  3. Open the hood and locate the oil dipstick.
  4. Remove it, wipe it clean, and reinsert it fully.
  5. Remove it again and check the oil level against the marked range.
  6. If the level is low, add only the oil specified for your vehicle and do not overfill.

Some modern vehicles use an electronic oil-level system instead of a traditional dipstick. Follow the instructions in your owner’s manual.

Checking the oil level does not replace an oil change. It only helps you identify a low level between services. If you see milky contamination, metal particles, a strong fuel smell, a rapidly dropping level, or an active leak, schedule professional service.

Common DIY oil-change mistakes

DIY maintenance can work when done correctly, but several mistakes create avoidable problems:

  • Using the wrong viscosity, such as 5W-20 instead of the required 0W-20
  • Installing the wrong filter
  • Forgetting to replace the drain-plug washer when required
  • Cross-threading or overtightening the drain plug
  • Leaving the old filter gasket stuck to the engine
  • Underfilling or overfilling the engine
  • Failing to check for leaks after starting the vehicle
  • Pouring used oil into a drain, onto the ground, or into household trash
  • Forgetting to reset the oil-life monitor or record the service

If you are unsure about the correct oil specification, filter, torque requirement, or disposal process, professional service is the safer choice.

Small maintenance items that are easy to overlook

An oil change appointment is a convenient time to check other wear items.

A dirty engine air filter can restrict airflow to the engine. MOMS offers engine air filter replacement at your home or office.

A clogged cabin air filter can reduce HVAC airflow and allow more dust, pollen, and odors into the passenger compartment. Ask about cabin air filter replacement, especially if you drive frequently during Montgomery County’s high-pollen seasons.

Worn windshield wipers can leave streaks, skip across the glass, or reduce visibility during rain and snow. MOMS can install new wiper blades at your location.

Technician replacing an engine air filter during a driveway service

Technician replacing a cabin air filter inside a vehicle

When to see a professional immediately

Do not wait for your next routine appointment if you notice:

  • An oil-pressure warning light
  • Knocking, ticking, or grinding from the engine
  • Blue or heavy exhaust smoke
  • A strong burning-oil smell
  • Oil spots under the vehicle
  • A low oil level that returns quickly
  • Overheating
  • A battery that struggles to start the vehicle

MOMS serves Ambler and surrounding Montgomery County communities, including drivers searching for oil change Blue Bell, oil change Horsham PA, Willow Grove, Lansdale, Jenkintown, and Conshohocken service.

For businesses with multiple vehicles, MOMS also provides on-site fleet maintenance. Parked vehicles do not make money, so mobile fleet service helps reduce downtime by servicing cars, vans, and light-duty trucks where they sit.

Book your Ambler oil change

You should not have to choose between professional vehicle care and a productive day. MOMS Mobile Oil Change brings certified technicians, premium products, a new filter, a 23-point inspection, and a spotless service experience to your driveway or office.

If you need a mobile oil change Philadelphia drivers can schedule around work and family life, book your service online today.

Sources and further reading

Crude Volatility and the 24.2% Motor Oil Spike: Why Fixed Shops Are Passing on Inflation (And How Mobile Fleets Are Absorbing It)

Oil change service costs are rising, and the pressure is reaching drivers and fleet managers across Philadelphia, Montgomery County, and the broader U.S. market. Since February 2026, comparable retail motor-oil products have increased by an average of 24.2%, according to a matched-product review from JobbersWorld.

This is not simply a story about crude oil.

It is a story about crude volatility, the Strait of Hormuz, constrained base-oil supply, higher logistics costs, and the operating model used to deliver vehicle maintenance.

For fixed-location service businesses, rising inputs often lead directly to higher customer prices. For fleets, however, the larger opportunity is controlling the cost around the oil change: technician travel, vehicle downtime, dispatching, and lost productivity.

That is where mobile maintenance changes the equation.

The 2026 oil market has been unusually volatile

The past six months have produced extreme swings in global crude markets.

The U.S. Energy Information Administration’s August 2026 Short-Term Energy Outlook reported that Brent crude fell as low as $69 per barrel on July 2, then climbed as high as $105 per barrel on July 23 after renewed attacks on tankers and reduced shipments through the Strait of Hormuz.

EIA now expects Brent to average approximately:

Period Brent crude outlook
July 2, 2026 low $69 per barrel
July 23, 2026 high $105 per barrel
Q3 2026 forecast Approximately $85 per barrel
Q4 2026 forecast Approximately $78 per barrel
2027 forecast Approximately $69 per barrel

Brent crude oil spot price and global inventory changes

The important point is not just the average price. It is the uncertainty.

A business can budget more effectively around a stable $85 barrel than around a market that moves from $69 to $105 in a matter of weeks. Volatility makes procurement, pricing, and inventory planning more difficult throughout the lubrication supply chain.

Why the Strait of Hormuz matters to motor oil

The Strait of Hormuz is a critical energy chokepoint. EIA estimates that crude oil and petroleum liquids moving through the strait averaged 4.9 million barrels per day in the second quarter of 2026, down from 21.6 million barrels per day in the fourth quarter of 2025.

That disruption affects more than gasoline and diesel.

The United States is a net importer of certain base oils, particularly Group III base oil, which is widely used in full synthetic motor oils. Group III base oil is important for modern low-viscosity formulations such as 0W-20 and many OEM-approved synthetic products.

According to reporting from NPR, more than 45% of U.S. Group III imports come from the Middle East. The conflict has disrupted both shipping and production. Damage to Qatar’s Shell Pearl gas-to-liquids facility also removed a significant source of Group III supply.

This creates a supply problem with several layers:

  • Fewer barrels moving through a critical shipping route.
  • Reduced production from damaged or disrupted facilities.
  • Higher costs for alternative supply.
  • Longer and more expensive transportation routes.
  • Greater competition for available low-viscosity synthetic base oils.
  • More frequent product allocations and selective shortages.

Crude oil is only one component of motor oil pricing. Finished lubricant costs also include base oil, additives, packaging, transportation, labor, inventory carrying costs, and distributor and retail margins.

That is why a change in crude prices does not translate into an identical change at the service counter. The effect is delayed, uneven, and often larger for synthetic products that depend on constrained Group III supply.

The 24.2% retail motor-oil increase is broad-based

JobbersWorld compared 97 directly matched motor-oil products at the same major U.S. big-box retail channel. Prices observed on February 2 were compared with prices observed on August 10.

The result: prices were collectively 24.2% higher.

The breadth of the increase is significant:

  • 87 of 97 products increased in price.
  • 10 products were unchanged.
  • None of the products declined.
  • 26 products increased by 30% or more.
  • Five-quart full-synthetic products generally experienced some of the largest increases.

Retail motor-oil price increases were broad-based from February to August 2026

This is not a perfect market-wide price index. It is a point-in-time comparison of matched retail products. Product formulation, package size, inventory age, brand, and retailer pricing strategy all affect the result.

Still, the direction is clear. The lubricant pricing cycle has reached the consumer shelf.

For vehicle owners, that means a routine oil change may cost more even when the vehicle, labor time, and service procedure have not changed.

Why fixed shops are passing more inflation through

Traditional fixed-location shops operate with a cost structure built around a physical facility.

That structure can provide important advantages for complex repairs. But it also creates fixed costs that continue whether a bay is busy or empty:

  • Rent or mortgage payments.
  • Utilities and facility maintenance.
  • Equipment financing.
  • Customer waiting areas.
  • Front-desk and administrative overhead.
  • Vehicle movement inside the facility.
  • Capacity lost during slow periods.
  • Inventory stored on-site.

When oil, filters, wages, insurance, and parts all rise together, many fixed-location operators have limited choices. They can reduce margins, raise prices, reduce staffing, or pass more of the increase to customers.

That is not necessarily poor management. It is often the predictable result of the operating model.

The old model asks the customer to spend time traveling to the shop, waiting for service, and returning to work or home. In a market where time and operating costs are both rising, that model increasingly resembles the new Blockbuster Video: familiar, established, and less competitive because it requires the customer to do the work of getting there.

How mobile maintenance changes the cost equation

Mobile maintenance does not make base oil inflation disappear. MOMS Mobile Oil Change still purchases quality lubricants, filters, parts, equipment, insurance, and professional labor.

The difference is where the service takes place.

We come to you.

For a consumer, that means an oil change at your house, in your driveway, or at your office. For a fleet manager, it means an on-site fleet service program that reduces vehicle transfers and keeps technicians from spending productive hours driving vehicles to a shop.

MOMS’s fleet maintenance program is built around:

  • On-site fleet servicing.
  • Batch scheduling for multiple vehicles.
  • After-hours scheduling.
  • Maintenance tracking and reminders.
  • Detailed reporting.
  • Predictable service cycles.
  • Fleet service at yards, offices, and depots.

The savings are operational rather than theoretical.

A parked service truck does not generate revenue. A delivery van sitting in a waiting room does not complete deliveries. A technician traveling across town to drop off or retrieve vehicles is not serving customers.

Mobile fleet maintenance attacks those hidden costs by servicing vehicles where they already sit.

Operational control matters more than chasing the lowest oil price

Fleet managers and operations directors should not respond to supply pressure by choosing an oil that fails to meet the manufacturer’s requirements.

The correct response is control.

That includes:

  1. Confirming the required viscosity and OEM specification.
    Do not substitute a product solely because it is available. A 0W-20 or 5W-30 label is not enough by itself. The oil must meet the required performance standard.

  2. Standardizing approved products where possible.
    A fleet with fewer approved oil and filter combinations is easier to schedule, stock, track, and invoice.

  3. Scheduling preventive maintenance before vehicles are overdue.
    Delaying service can turn a manageable maintenance cost into a major repair or an avoidable vehicle outage.

  4. Batching multiple vehicles at one location.
    Same-day service reduces dispatching friction and keeps the maintenance schedule visible.

  5. Combining inspections with routine oil changes.
    A full synthetic oil change should be an opportunity to identify worn wipers, restricted cabin air filters, dirty engine air filters, weak batteries, and developing brake concerns.

MOMS includes professional inspections with oil-change services and can also handle cabin air filter replacement, engine air filter replacement, windshield wiper replacement, and battery and brake system checks.

That matters because a filter or battery issue discovered during scheduled maintenance is easier to manage than a vehicle failure during a customer appointment or delivery route.

MOMS Mobile Oil Change vehicle supporting on-site fleet maintenance

The practical outlook for the rest of 2026

The market may stabilize if Strait of Hormuz traffic normalizes, disrupted production returns, and inventories begin rebuilding. EIA expects Brent prices to ease toward approximately $78 per barrel in the fourth quarter and $69 per barrel in 2027 under its current assumptions.

But lower crude prices will not immediately restore pre-2026 motor-oil pricing.

Supply contracts, damaged production capacity, inventory replacement costs, and new transportation patterns can continue affecting finished lubricants after crude markets calm down. The full synthetic products most dependent on Group III base oil may remain under the greatest pressure.

For drivers, the best strategy is simple:

  • Follow the manufacturer’s maintenance schedule.
  • Use the correct oil specification.
  • Do not postpone necessary service.
  • Ask about approved alternatives if a specific product is unavailable.
  • Combine oil changes with filter, wiper, battery, and brake checks.
  • Choose a service model that saves time as well as money.

For fleets, the priority is even clearer: reduce downtime.

Mobile maintenance is a form of cost control

The oil industry is operating in a period of volatility. Crude prices are moving sharply. The Strait of Hormuz remains a major supply risk. Group III base oils are constrained. Retail motor oil prices have already increased by 24.2% in a matched-product comparison.

Businesses cannot control geopolitics. They can control how maintenance is scheduled and delivered.

MOMS Mobile Oil Change helps fleets and busy drivers absorb market pressure through operational efficiency: professional technicians, premium products, on-site service, documented maintenance, and less time spent moving vehicles to a shop.

Whether you need an oil change near me in Ambler, Philadelphia, Montgomery County, or surrounding communities, the principle is the same:

Your vehicle should not have to lose half a day for routine maintenance.

Book your mobile oil change or request a fleet quote and take control of the maintenance process at your driveway, office, yard, or fleet location.

Market figures and forecasts in this article reflect information available on August 13, 2026. Crude and lubricant markets can change quickly. The 24.2% retail figure comes from JobbersWorld’s matched-product review and should not be interpreted as a universal price index for every motor-oil product or service provider.

Sources

The Mobile Oil Change Operating Model: A Technical White Paper on the Future of On-Site Service

"If my goal was to build a mobile oil change company that serves 5,000 active customers, I wouldn't start by asking how to do more oil changes. I'd ask how to build a machine that consistently acquires, retains, and services customers profitably."

That founder insight from Tyreese Burton is the right starting point for understanding the mobile oil change operating model. The central question is not how to complete a single service faster. The central question is how to design an operating system that can scale customer demand, field execution, and administrative control without letting complexity outpace margin.

This white paper uses that framework to examine five pillars of a durable mobile maintenance company. It argues that the shift away from fixed-bay service is real, but category demand alone does not create a defensible operator. Operators win when they build systems for predictable customer acquisition, retention, standardized execution, route density, and administrative leverage through technology.

The technical conclusion is straightforward: a mobile oil change business is not really in the oil business. It's in the logistics business.

Bar graph illustrating the projected growth of the mobile oil change market through 2035, highlighting a 7.0% CAGR.

Pillar 1: Predictable Customer Acquisition

A mobile service company cannot scale on referrals alone. Referrals are valuable, but they are not an acquisition system. An operator who intends to reach thousands of active customers must know where demand comes from, what each booked customer costs, which channels produce high-retention households or fleets, and how location-level demand converts into routeable work.

As consumer behavior shifts toward friction removal, the old fixed-bay assumption weakens. Drivers increasingly prefer a mobile oil change, an oil change that comes to you, or an at home oil change that removes the trip, the wait, and the scheduling burden. That demand shift creates opportunity, but it only becomes a business asset when it is measured and repeated.

For a mobile operator, predictable acquisition requires:

  1. Channel discipline: track booked jobs by source, cost, geography, and vehicle mix.
  2. Geographic specificity: build demand suburb by suburb, not with vague regional messaging. Markets like Ambler, PA, Blue Bell, Horsham, and Lansdale must be evaluated as route-building territories, not just advertising audiences.
  3. Fit over volume: the best customers are not simply the cheapest to acquire. They are the customers who rebook, accept maintenance recommendations, and live or work in zones that support route density.
  4. Operational alignment: acquisition should not outpace service capacity. Demand that lands outside the service map or in low-density clusters can destroy technician productivity.

This is where many operators misread the market. They believe increased lead flow is the same as growth. It is not. Growth only occurs when acquired demand can be fulfilled profitably inside a repeatable operating model.

Pillar 2: Retention > Acquisition

The most expensive oil change is the one that forces a company to reacquire the same customer from scratch six months later. In mobile maintenance, retention is not a soft metric. It is a core economic control.

A retained customer lowers blended acquisition cost, improves route planning, increases maintenance attach rates, and creates more predictable technician utilization. The business becomes more stable when it knows not only how many jobs it can book this week, but how many customers are already expected to return.

Retention strengthens when the service experience is standardized and professional:

  • The service arrives at the customer’s location: their driveway, office, or fleet yard.
  • The work is clean and technically credible: no mess, no uncertainty, no improvisation.
  • The recommendations are legitimate and documented: including cabin air filters, engine air filters, windshield wipers, and battery health checks when needed.
  • The interval is remembered: the next service is not left to chance.

Retention also changes the operating math for fleets. For a fleet maintenance account, recurring service reduces downtime uncertainty and simplifies maintenance forecasting. For consumer accounts, it converts an occasional transaction into a scheduled household service relationship.

In practical terms, the operator who wins this category is not the one who can shout the loudest about convenience. It is the one who can reliably bring customers back on the right interval with the same professional outcome every time.

Pillar 3: Standardize the Operation

Standardization is what turns a good technician into a scalable company. Without standardization, every service depends on individual memory, field improvisation, and inconsistent judgment. That model breaks as volume grows.

The mobile environment makes standardization even more important than in a fixed shop. The technician is operating away from a bay manager, away from a parts room, and away from traditional supervisory structures. The system must therefore travel with the unit.

A mobile operator needs documented standards for equipment, inspection flow, compliance, parts handling, customer communication, and exception management. This is the backbone of repeatable field performance. It is also where tools such as PolicyPro become operationally useful for building and maintaining SOP discipline.

The Mobile Service Unit (MSU) Framework

A MOMS Mobile Oil Change unit is not just a van; it is a precision-engineered mobile service platform. To deliver dealership-quality work in a residential driveway or office parking lot, the MSU must solve for payload, fluid handling, containment, storage logic, and technician ergonomics.

Our MSUs utilize high-roof, long-wheelbase commercial vans designed for maximum vertical storage.

  • Precision Oil Extraction: We utilize vacuum-sealed, pump-free extraction systems. These enclosed systems eliminate the risk of spills on a customer’s driveway and allow for the clean removal of used oil directly into 60-gallon waste tanks.
  • Fluid Delivery Systems: Each unit is equipped with metered hose reels for Full Synthetic oil, specifically Mobil 1. Digital meters ensure that the exact manufacturer-recommended volume is delivered to the milliliter.
  • The 23-Point Inspection Suite: Beyond the oil, our technicians carry specialized diagnostic tools for battery health checks, digital tread depth gauges, and high-performance replacement inventory, including engine air filters, cabin air filters, and wiper blades.

Close-up of a technician using a high-precision extraction system with a bottle of Mobil 1 Full Synthetic oil, emphasizing technical precision.

Standardization also governs environmental and regulatory execution.

Waste Oil Compliance

All used oil is transported in double-walled, DOT-approved tanks and is recycled at certified facilities. A closed-loop system keeps waste oil contained from extraction to disposal. In a mobile environment, compliance is not a secondary concern. It is a design requirement. A company that cannot prove clean handling, controlled transport, and documented disposal does not have a scalable field model.

Inventory and Inspection Consistency

Because vehicle data is collected during the booking process, the service unit can be staged with the correct oil filter, cabin air filter, engine air filter, and replacement wiper blades before departure. That reduces service delays and protects technician time in the field.

The inspection process matters just as much. A documented 23-point inspection creates consistency across technicians, improves quality control, and supports credible maintenance recommendations instead of ad hoc upselling.

Pillar 4: Routes, Not Appointments (Route Density)

Many operators think in terms of isolated appointments. Strong operators think in terms of routes. That distinction determines whether a mobile business scales cleanly or gets buried in windshield time.

The unit of economic performance is not simply the completed oil change. It is the completed oil change inside a dense and efficient service route. A technician who performs fewer miles per job, fewer non-billable transitions, and more high-quality stops per day will produce a stronger contribution margin than a technician who spends the day crossing a fragmented map.

A visual of multiple MOMS Mobile Oil Change vans, representing the scalability of on-site fleet maintenance.

Route density requires:

  1. Geo-fenced planning: cluster work in markets such as Willow Grove, Conshohocken, Jenkintown, and Montgomery County rather than treating every booking as equal.
  2. Demand shaping: steer available booking windows toward zones that improve density.
  3. Vehicle data before dispatch: know the service package, oil spec, filter requirements, and probable add-on needs before the route launches.
  4. Fleet block scheduling: service multiple units at one site to reduce downtime and compress travel cost.

This is the operational expression of the core insight: a mobile oil change business is not really in the oil business. It's in the logistics business.

That is especially true for B2B accounts. Parked trucks do not make money. Fleet managers and operations leaders do not primarily buy oil changes. They buy uptime, predictability, and less administrative friction. An on-site fleet service model only delivers on that promise when route design keeps technicians productive and vehicles available.

A professional MOMS technician in a branded uniform performing a 23-point inspection on a client's vehicle in a sunlit driveway.

Pillar 5: Technology to Eliminate Admin Work

The next bottleneck in a growing mobile business is rarely wrenching skill. It is administrative drag. Dispatch changes, reminder gaps, quote follow-up, technician notes, invoice handling, customer history, and interval tracking can quietly consume the margin created in the field.

Technology should not be layered on as decoration. It should remove repetitive administrative work so the company can add customers without adding proportional back-office complexity. That is where systems such as Service Writer become strategically important. A purpose-built operating platform for booking, dispatch, payments, communication, and AI-assisted workflows can absorb work that otherwise requires manual coordination. For operators evaluating this category, Service Writer belongs in the technology discussion because it addresses the hidden labor that often limits scale.

The objective is not software for software’s sake. The objective is organizational leverage:

  • Reduce manual scheduling errors.
  • Keep technician workflows consistent.
  • Preserve vehicle and customer history.
  • Automate reminders and status communication.
  • Support recurring maintenance intervals.
  • Improve reporting by route, technician, and customer cohort.

When technology is correctly implemented, growth does not force the office to grow at the same rate as the route count.

Economic Comparison Under the Five-Pillar Model

The economics of the mobile model are best understood as a systems comparison, not just a service comparison. Traditional fixed-bay operators carry real estate costs, customer friction, and rigid throughput constraints that mobile operators can often avoid. Mobile operators, however, only earn that advantage through acquisition discipline, retention, standardization, route density, and administrative leverage.

Feature Traditional Shop MOMS Mobile Oil Change
Fixed Overhead Very High (Lease/Property) Low (Central Hub only)
Customer Time Cost 60 – 120 Minutes 0 Minutes (We come to you)
Service Quality Varies by Bay Consistent (Certified Techs)
Convenience Low Extreme
Fleet Suitability Low (Requires Downtime) High (Zero Downtime)

For fleet operators, this comparison becomes more pronounced. Every hour a company vehicle spends at a shop is non-productive time. A strong mobile model reduces that loss by servicing vehicles on-site during planned downtime or off-hours, preserving utilization while simplifying maintenance execution.

Conclusion: A Scalable Mobile Operator Is a System, Not a Van

The market shift toward on-site maintenance is real, but demand alone does not build a durable company. Durable companies are built by operators who understand that customer acquisition must be predictable, retention must outperform reacquisition, field execution must be standardized, routes must be designed for density, and technology must strip admin work out of the model.

The long-term success metric is not whether a company can survive another busy week. It is whether the system can absorb more customers without creating proportional disorder.

"When I add another 1,000 customers, I don't want 1,000 more problems. I want the same system to absorb that growth with only incremental increases in staff and overhead."

For operators, investors, and industry partners evaluating the future of on-site maintenance, that is the core takeaway. The winning company will not be the one with a van and a marketing claim. It will be the one with a repeatable operating model that turns convenience into a scalable system.

Preventative Maintenance Cycles for Ford F-Series & Transit Fleet Vans: The Philadelphia HVAC/Plumbing Guide

If you’re running an HVAC or plumbing fleet in Montgomery County, your trucks aren't just vehicles: they’re mobile warehouses, workshops, and billboards. Whether it’s a Ford F-150 with the 2.7L EcoBoost or a high-roof Ford Transit 350, these assets are the backbone of companies like Hirschberg Mechanical and PlumbPRO.

But there’s a problem. Philadelphia’s geography is a precision-engineered engine killer. Between the "Schuylkill Crawl" on I-76, the stop-and-go madness of the Blue Route (I-476), and the deep-dish potholes of secondary roads in Ambler and Jenkintown, your Ford fleet is under constant "Severe Service" conditions.

At MOMS Mobile Oil Change, we don’t just change oil. We remove the friction that slows down your business. While your techs are off the clock, we’re in your lot, ensuring your vans are ready for the next 7:00 AM dispatch.

The Asset Profile: Why Ford Gas Fleets Are Different

Most fleet managers look at the manual and see a 7,500 or 10,000-mile oil change interval. In a laboratory, that’s fine. In the Greater Philadelphia area, it’s a recipe for premature engine failure.

The 2.7L & 3.5L EcoBoost: The Fuel Dilution Factor

The EcoBoost engines in your F-150s are marvels of torque, but they have a specific vulnerability: fuel dilution. When your vans spend three hours a day idling at job sites or crawling through Conshohocken traffic, unburnt gasoline can wash past the piston rings and into your oil. This thins the lubricant, putting your turbochargers at risk.

The Transit 350: The High-Roof Workhorse

The Transit 350 gas (3.5L PFDi) is a reliable beast, but it carries immense weight. These vans operate near their Gross Vehicle Weight Rating (GVWR) 100% of the time. That constant load generates extreme heat, which breaks down conventional oil and cooks transmission fluid.


The MOMS "Severe Service" PM Schedule

For a fleet to survive the I-76 corridor, you need a proactive maintenance silo. Here is the operational breakdown we recommend for the Philadelphia HVAC/Plumbing asset class.

1. Engine Oil: The 5,000-Mile Hard Line

Forget the 10,000-mile dream. For the 2.7L EcoBoost and any Transit 350 doing heavy city work, 5,000 miles is your hard limit.

  • The MOMS Edge: We use Full Synthetic Oil Changes featuring Mobil 1 premium products to combat the high-heat and fuel dilution inherent in these Ford powerplants.

2. Transmission Fluid: Saving the 10R80

The 10-speed 10R80 transmission in modern Fords is fantastic: until it isn't. Ford’s "normal" service interval is 150,000 miles. For a plumbing truck loaded with copper pipe and water heaters, that’s a fairy tale.

  • The Cycle: We recommend a fluid exchange every 60,000 miles to clear out break-in debris and prevent the dreaded "hard shift" that leads to a $6,000 rebuild.

Technician replacing a dirty engine air filter on a Ford F-150, highlighting the grit from Philly roads.

3. Air Filters: Protecting the Breath of the Business

Philadelphia's humidity and road dust are brutal on filters.

  • Engine Air Filter: Inspect every 10k, replace by 20k miles. A clogged filter kills fuel economy: and with gas prices today, that’s a direct hit to your margin.
  • Cabin Air Filter: Your techs spend 8 hours a day in that cab. Cabin air filter replacement every 20,000 miles keeps the AC blowing cold and the air clean, which is a literal breath of fresh air for employee retention.

The "Philly Pothole Tax": Brakes and Tires

If you drive the Blue Route or navigate the narrow streets of Lansdale, you know the tax. Your brakes and tires aren't just wearing down; they’re being assaulted.

Graphic titled THE PHILLY POTHOLE TAX showing worn brake components and I-76 location markers.

Brake Inspections Every 7,500 Miles

A fully loaded Ford Transit 350 doesn't stop on a dime. It stops on friction. We perform a comprehensive brake inspection with every mobile oil change. We catch thin pads before they become "metal-on-metal" rotor-killing emergencies.

Tire Rotations: Fighting the Misalignment

The potholes on the way to Doylestown or Willow Grove will knock your alignment out in a week. Regular tire rotations (every 7,500 miles) are the only way to get the full life out of a set of tires on a commercial van.


The Economics of Convenience: Billable Hours vs. Waiting Rooms

Let’s talk numbers. When a tech like Hirschberg Mechanical sends a van to a traditional shop or dealership:

  1. Travel Time: 30–45 minutes each way.
  2. The Wait: 1.5–2 hours in a sterile waiting room drinking bad coffee.
  3. Lost Opportunity: That’s 3 hours of billable service time gone.

If your lead tech bills at $150/hour, that "cheap" oil change just cost you $450 in lost revenue.

MOMS Mobile Oil Change eliminates that downtime. We are in the "Friction Removal" business. We come to your shop in Ambler, your office in Montgomeryville, or even your tech’s driveway. While they’re sleeping or loading their tools for the day, we’re getting the PM done.

MOMS technician checking tires and brakes on an F-150 in an office parking lot.

Lock in Your Fleet’s Future

Don't treat your Ford fleet like a passenger car. Treat it like the revenue-generating asset it is. By following a structured PM cycle and leveraging the fleet maintenance services of MOMS, you ensure your vans stay on the road: not in the shop.

Ready to stop wasting billable hours at the dealership?
Schedule your fleet’s on-site maintenance today and see why Philadelphia’s top HVAC and plumbing companies trust MOMS Mobile Oil Change to keep their wheels turning.